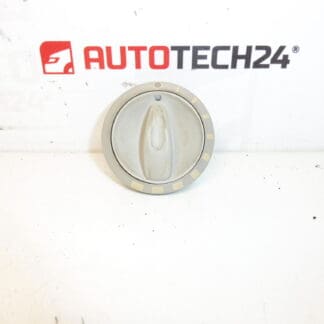
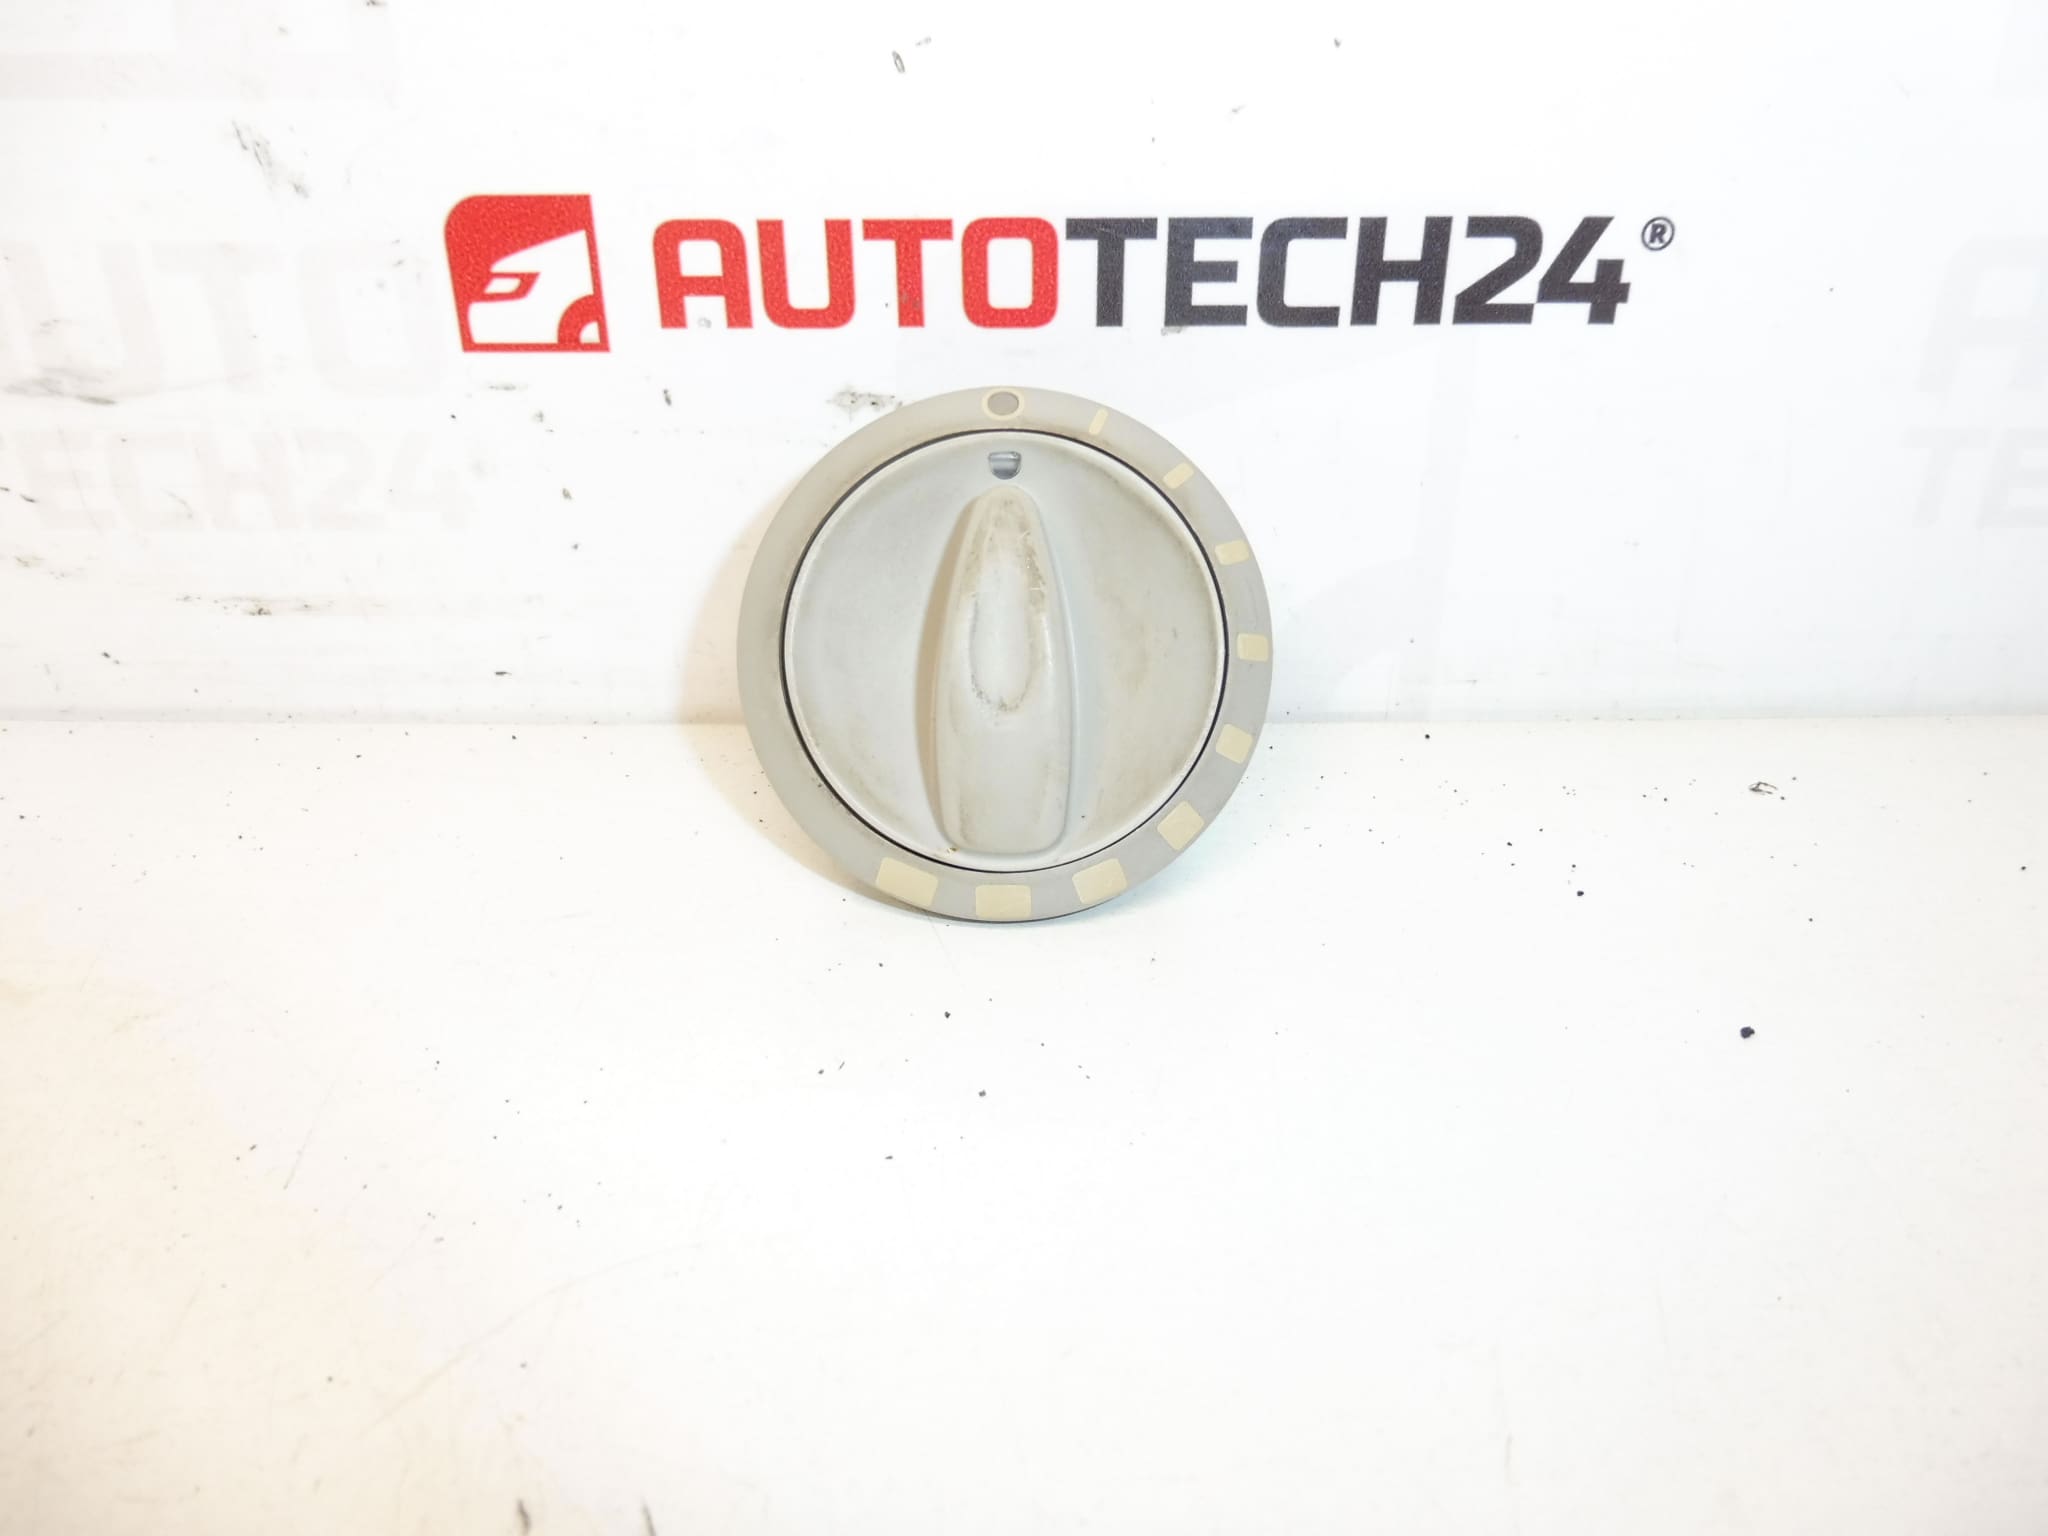
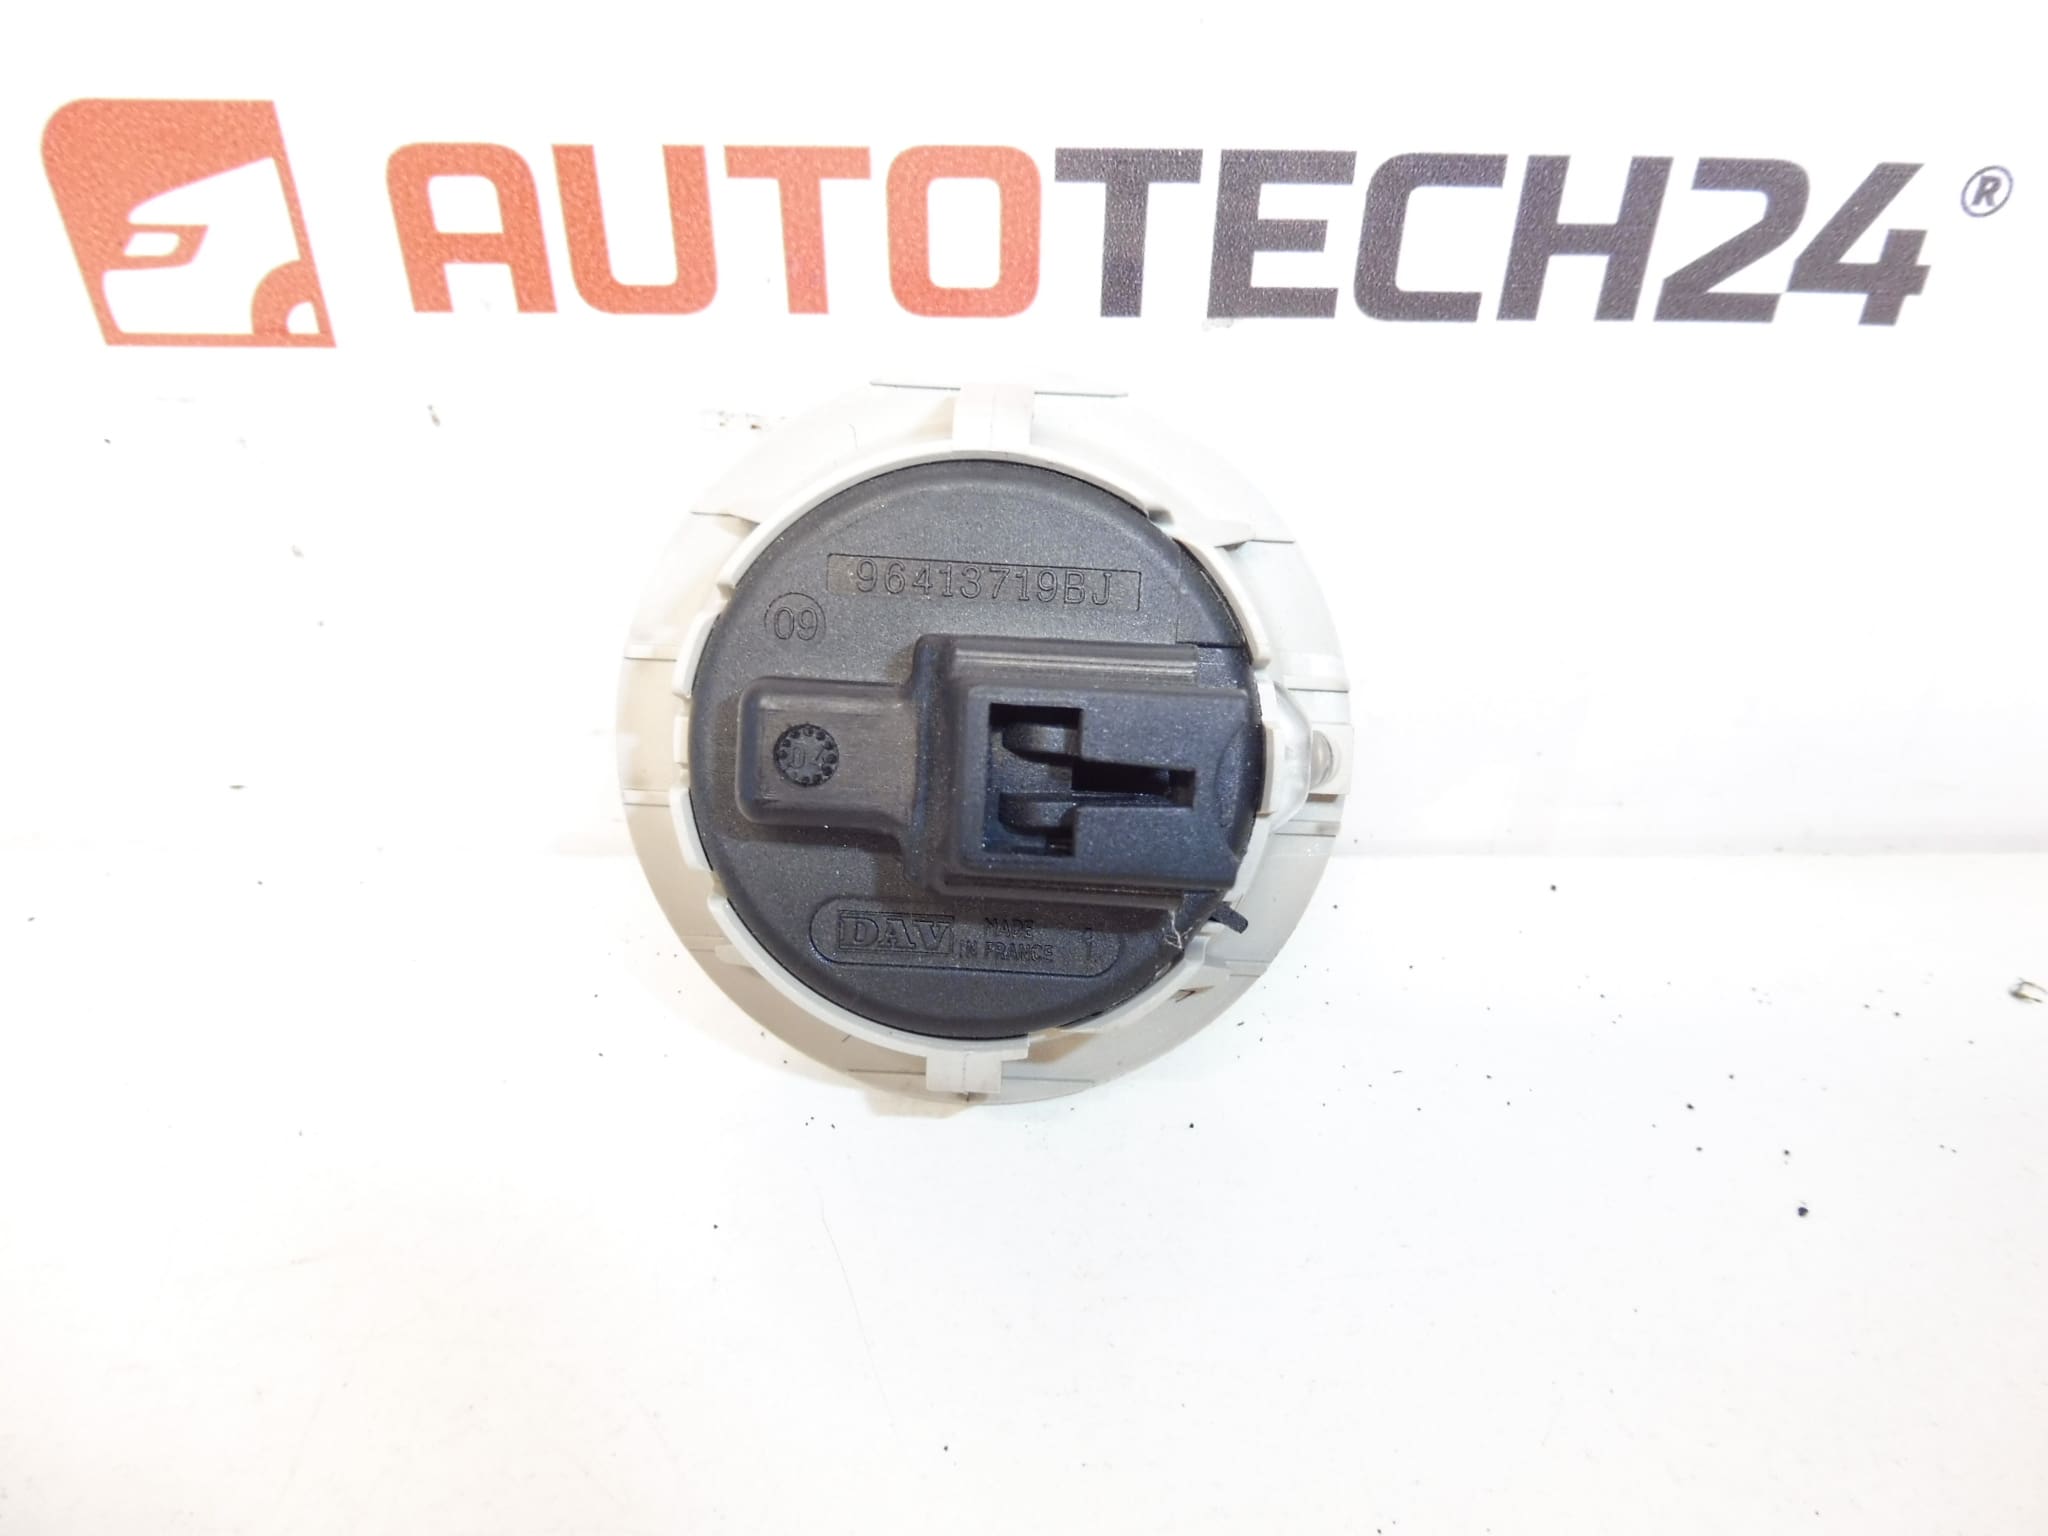
Peugeot 407 sunroof control 96413719BJ 6554Q3

36.00

Stellantis CITROEN PEUGEOT
96413719BJ 6554Q3 NFP

2 in stock

SKU: 7594-N24_K25 Categories: , , ,

Description

Roof curtain control for Peugeot 407, Citroen C3
Color FBJ – LAMA

Part description

This roof screen controller is intended for Peugeot 407 and Citroën C3 cars. It is an electric control element in the interior, which is used for convenient control of the roof curtain. Thanks to the search marks 96413719BJ and 6554Q3, it is also suitable for quickly finding the right part by product number (common practice in service centers and home repairs).

The shade is listed as FBJ – LAMA, which is especially important when replacing for the sake of appearance and harmony with the interior.

Technical information

  • Manufacturer: Stellantis (Citroën / Peugeot)
  • Model: Peugeot 407; Citroën C3
  • Other numbers: NFP

Product codes

  • Product codes: 96413719BJ, 6554Q3

Installation recommendations

Generally/typically applies (the exact procedure may vary depending on the specific car design and equipment):

1) Before assembly (checks of the used part, what to compare with the old part)

  • Compare product numbers 96413719BJ and 6554Q3 with the old part.
  • Check the color FBJ – LAMA if you are also dealing with the appearance in the interior.
  • Inspect the connector(s): there must be no crushed pins, cracks, traces of overheating or oxidation.
  • Check the mechanical condition: the buttons/cradle must move smoothly, without stuttering.

2) Necessary tools and materials (in general, without specific extra parts)

  • Set of plastic pry bars for dismantling interior parts
  • Screwdrivers / bits according to design (typically Torx/cross)
  • Small flashlight
  • Electrical contact cleaner (as needed) and a clean cloth

3) Step-by-step assembly procedure

  1. Turn off the ignition and disconnect the battery (typically negative pole) for safety reasons.
  2. Get access to the controller – carefully remove the surrounding cover/interior using plastic pry bars.
  3. Remove the controller attachment (screws or latches depending on the model).
  4. Slide out the controller to access the connector.
  5. Disconnect the electrical connector – do not pull on the wiring, release the connector lock.
  6. Compare the old and new piece (shape, connector, markings, color).
  7. If there is dirt/oxidation on the connector, gently clean the contacts and let them air out.
  8. Connect the connector to the new controller and check that the fuse clicks properly.
  9. Place the controller in the hole and fasten it in the original way (latches/screws).
  10. Put the surrounding covers/trimming back on and check that there is nothing in the way and that the parts line up.
  11. Connect the battery.
  12. Test the sunroof control function and verify that the controller responds correctly in all positions.
    • 4) Post-assembly checks and test drive/function verification

      • Verify smooth control function (response, button return, no dropouts).
      • Check that the backlight or other elements (if the controller is equipped with them) do not light up/flash during handling.
      • After a short drive, check the seating of the covers again (creaking, play).

      5) The most common assembly mistakes + how to avoid them

      • Interior plastic damage – use plastic pry bars and proceed sensibly.
      • Unplugged connector – always check the connector’s fuse and secure seating.
      • Bending/damaging the pins – fit the connector in the axis, without force.
      • Assembly without disconnecting the battery – may lead to short circuits or electrical errors; disconnecting is typically safest.

      Reasons why the part is damaged

      • Wear of contacts during frequent use (deteriorated response, blackouts).
      • Mechanical damage to buttons/latches due to careless handling or disassembly.
      • Oxidation and contamination of the connector (moisture, dust), which can cause intermittent connection.
      • Electrical overload/short circuit in the wiring or in the connected circuit, which can damage the internal part of the controller.

Additional information

Weight 0.4 kg