Description
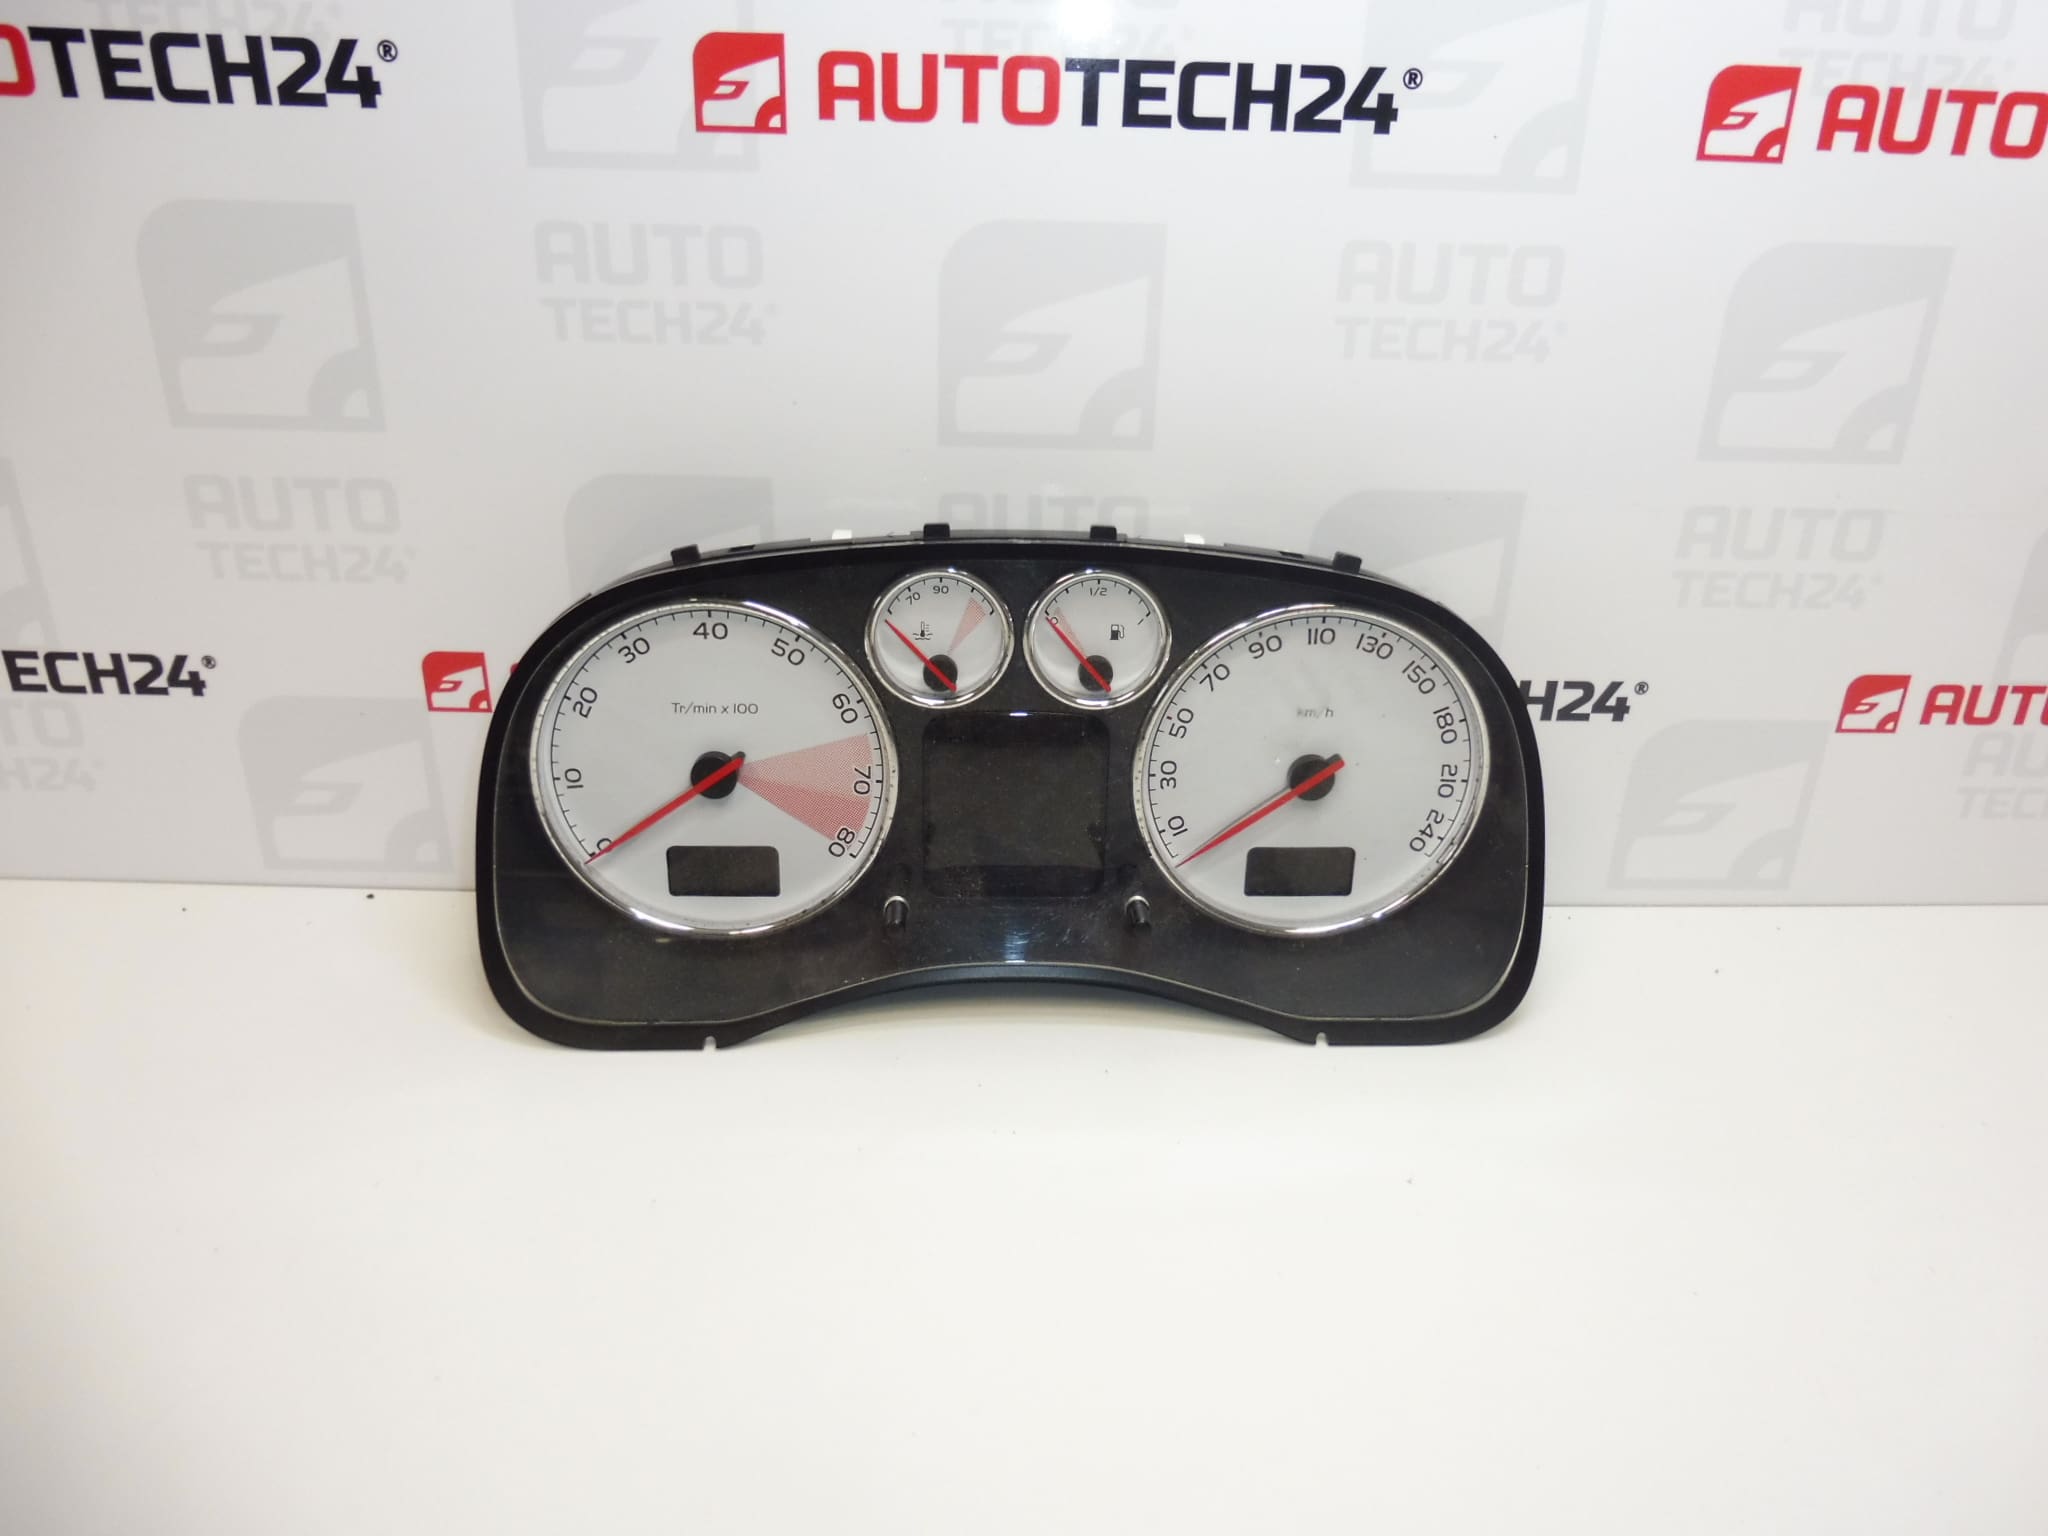
Speedometer for PEUGEOT 307 and 307 CC vehicles with a 2.0 16V engine
From a vehicle with 252 000 km on the odometer
Part description
Used Peugeot 307 and 307 CC speedometer for versions with a 2.0 16V engine. The instrument cluster displays speed, distance travelled and vehicle operating information. It is a suitable choice for replacing a faulty or damaged cluster, provided its part number and configuration match the original part.
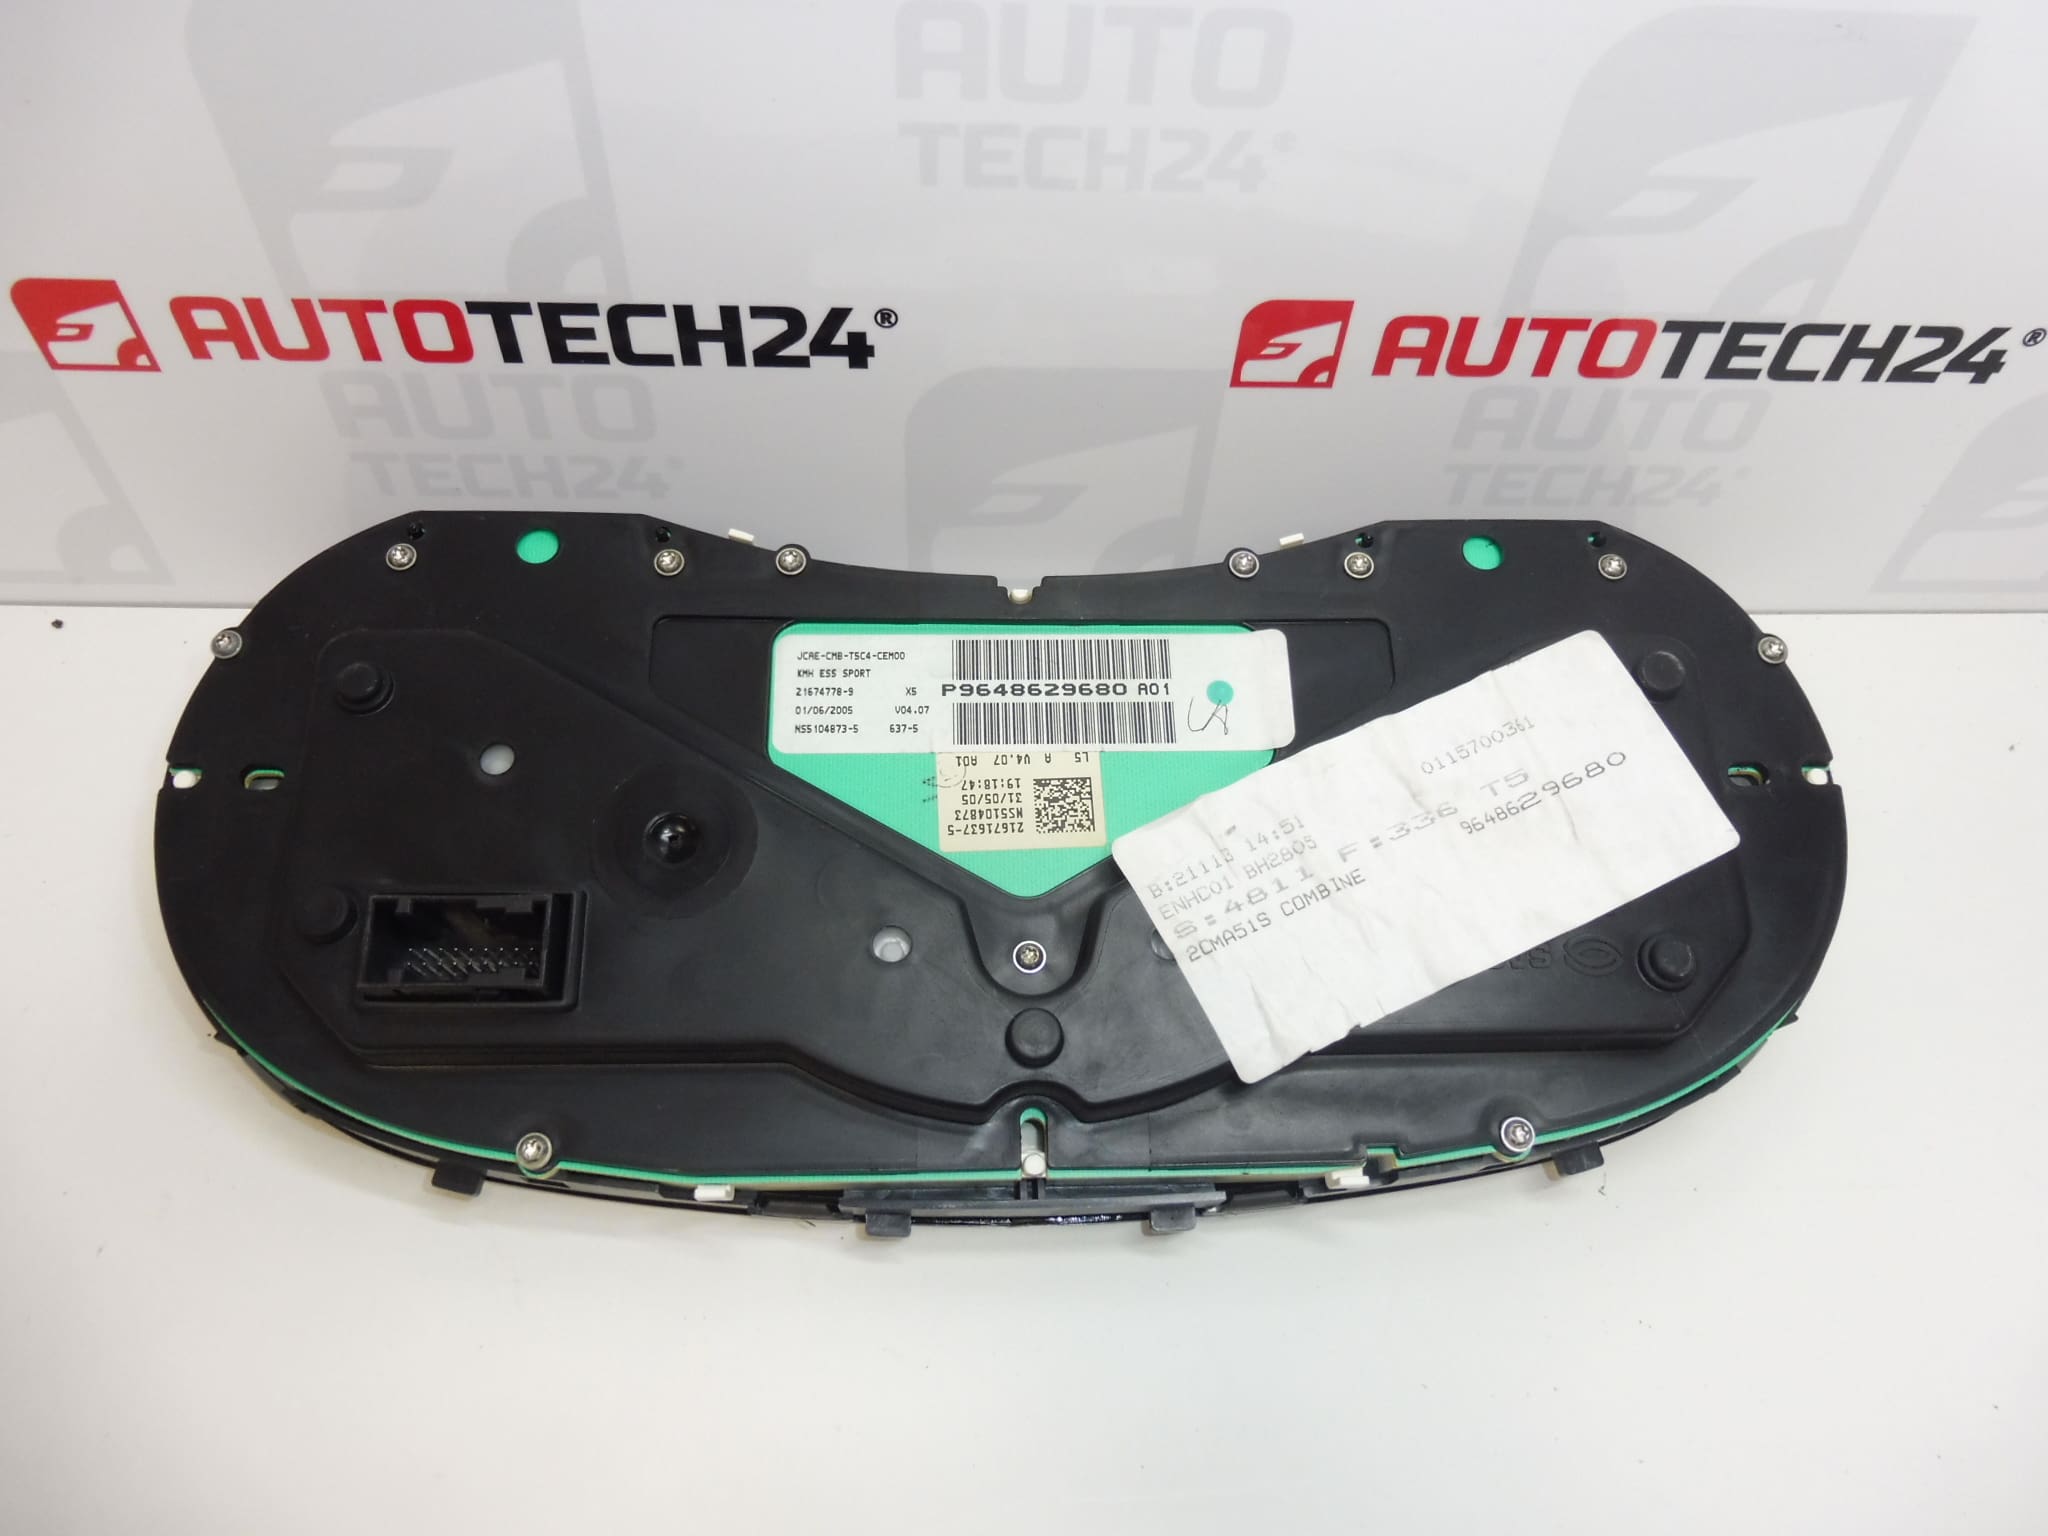
The identifiers 9648629680 and 6103J6 are particularly important when searching for the correct variant. The figure of 252 000 km refers to the donor vehicle’s mileage stated in the documentation, not a guarantee of the value that will be displayed after installation in another vehicle.
Technical information
- Manufacturer: not specified; the documentation lists the designation Stellantis CITROEN PEUGEOT.
- Model: Peugeot 307; PEUGEOT 307 CC.
- Engine according to the documentation: 2.0 16V.
- Part type: speedometer / instrument cluster.
- Condition: used part.
- Donor vehicle mileage: 252 000 km.
- Additional numbers: P9648629680, A01.
- Additional designation in the documentation: NFP.
Product codes
- Product codes: 9648629680, 6103J6.
- Additional listed number format: P9648629680.
- Supplementary designations: A01, NFP.
Before choosing, compare the identifiers with those on the original instrument cluster. A matching model name alone is not enough; the configuration of the connectors, mountings, dial scales and indicators is also important.
Installation recommendations
General guidance for this type of part: the following procedure is a general guide to replacing an instrument cluster. The exact removal procedure, method of disconnecting the power supply and any necessary configuration depend on the specific vehicle model and version. Follow the manufacturer’s service procedure.
1) Before installation
- Compare the product numbers, connectors, mounting points, dial scales and display configuration with the old unit.
- Check the housing, clear lens, mounting tabs and contacts. Look for cracks, oxidation, bent pins and signs of moisture.
- Record the original odometer reading and fault symptoms. Before replacement, also check the power supply, fuses and wiring, as the cause may not lie in the cluster.
- Before connecting it for the first time, establish how mileage is stored in the specific vehicle. In some systems, the mileage reading may be synchronised between control units, including adoption of the higher value. Therefore, do not connect a used cluster merely for testing without understanding this behaviour.
2) Required tools and materials
Typically, you will need suitable screwdrivers or bits for the fasteners used, a plastic trim removal tool, a torch, a soft pad and basic measuring equipment. Depending on the service procedure, diagnostic equipment compatible with the vehicle may also be required.
3) Step-by-step installation procedure
- Park the vehicle safely, switch off electrical equipment and record the available readings from the original cluster.
- Switch off the ignition and allow the electronic systems to enter sleep mode according to the manufacturer’s instructions.
- Disconnect the battery using the procedure specified for the vehicle.
- Carefully release any trim obstructing access to the cluster. Do not force plastic clips open.
- Release the original cluster’s fasteners and pull it out only far enough to avoid straining the wiring.
- Unlock the connectors and disconnect them by their housings, not by pulling on the wires.
- Compare the two parts again and inspect the vehicle’s wiring and connectors. Repair any damage found before connecting the replacement.
- After verifying the procedures for handling mileage data, connect the replacement cluster and lock the connectors.
- Position the cluster without pinching any wires, secure it and refit the removed trim.
- Restore the power supply according to the manufacturer’s procedure. If required for the particular version, carry out the prescribed configuration using suitable diagnostic equipment.
4) Post-installation checks and functional verification
Check display legibility, backlighting, gauge response and warning lights when switching on the ignition. Compare the displayed mileage with the reading recorded before replacement and document the replacement. Only carry out a short test drive after successfully completing the stationary checks; in particular, verify that the speedometer responds smoothly and that the display does not cut out.
5) Common installation mistakes and how to avoid them
- Choosing solely by appearance: also compare part numbers and electrical configuration.
- Connecting without checking how mileage is handled: first establish the procedure for the specific system.
- Working with the power connected: follow the prescribed procedure for disconnecting and restoring the power supply.
- An incompletely locked connector or a pinched wiring harness: check that the connectors are locked and the wiring is routed correctly before finishing.
- Damaging the housing and mounting tabs through excessive force: use suitable tools and tighten fasteners according to the service instructions.
Reasons why the part can become damaged
Instrument clusters can generally develop faults due to ageing electronics, vibrations, temperature changes or moisture ingress. Oxidised contacts and damaged connections can cause intermittent gauge or display failures. An unstable power supply and improper work on the electrical system also pose risks.
Mechanical damage to the housing and mounting tabs is often associated with careless removal. Before replacement, it is therefore advisable to eliminate any external cause of the fault so that it does not put the replacement part at risk. The causes listed are general and do not describe identified defects in this particular unit.