Description
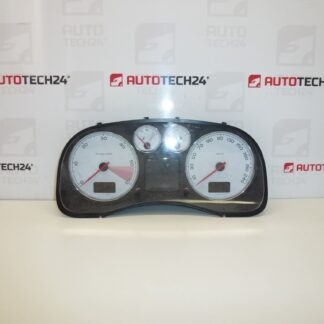
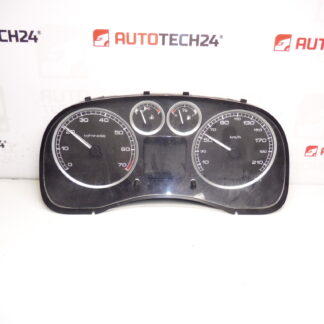
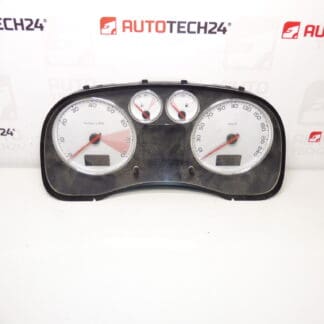
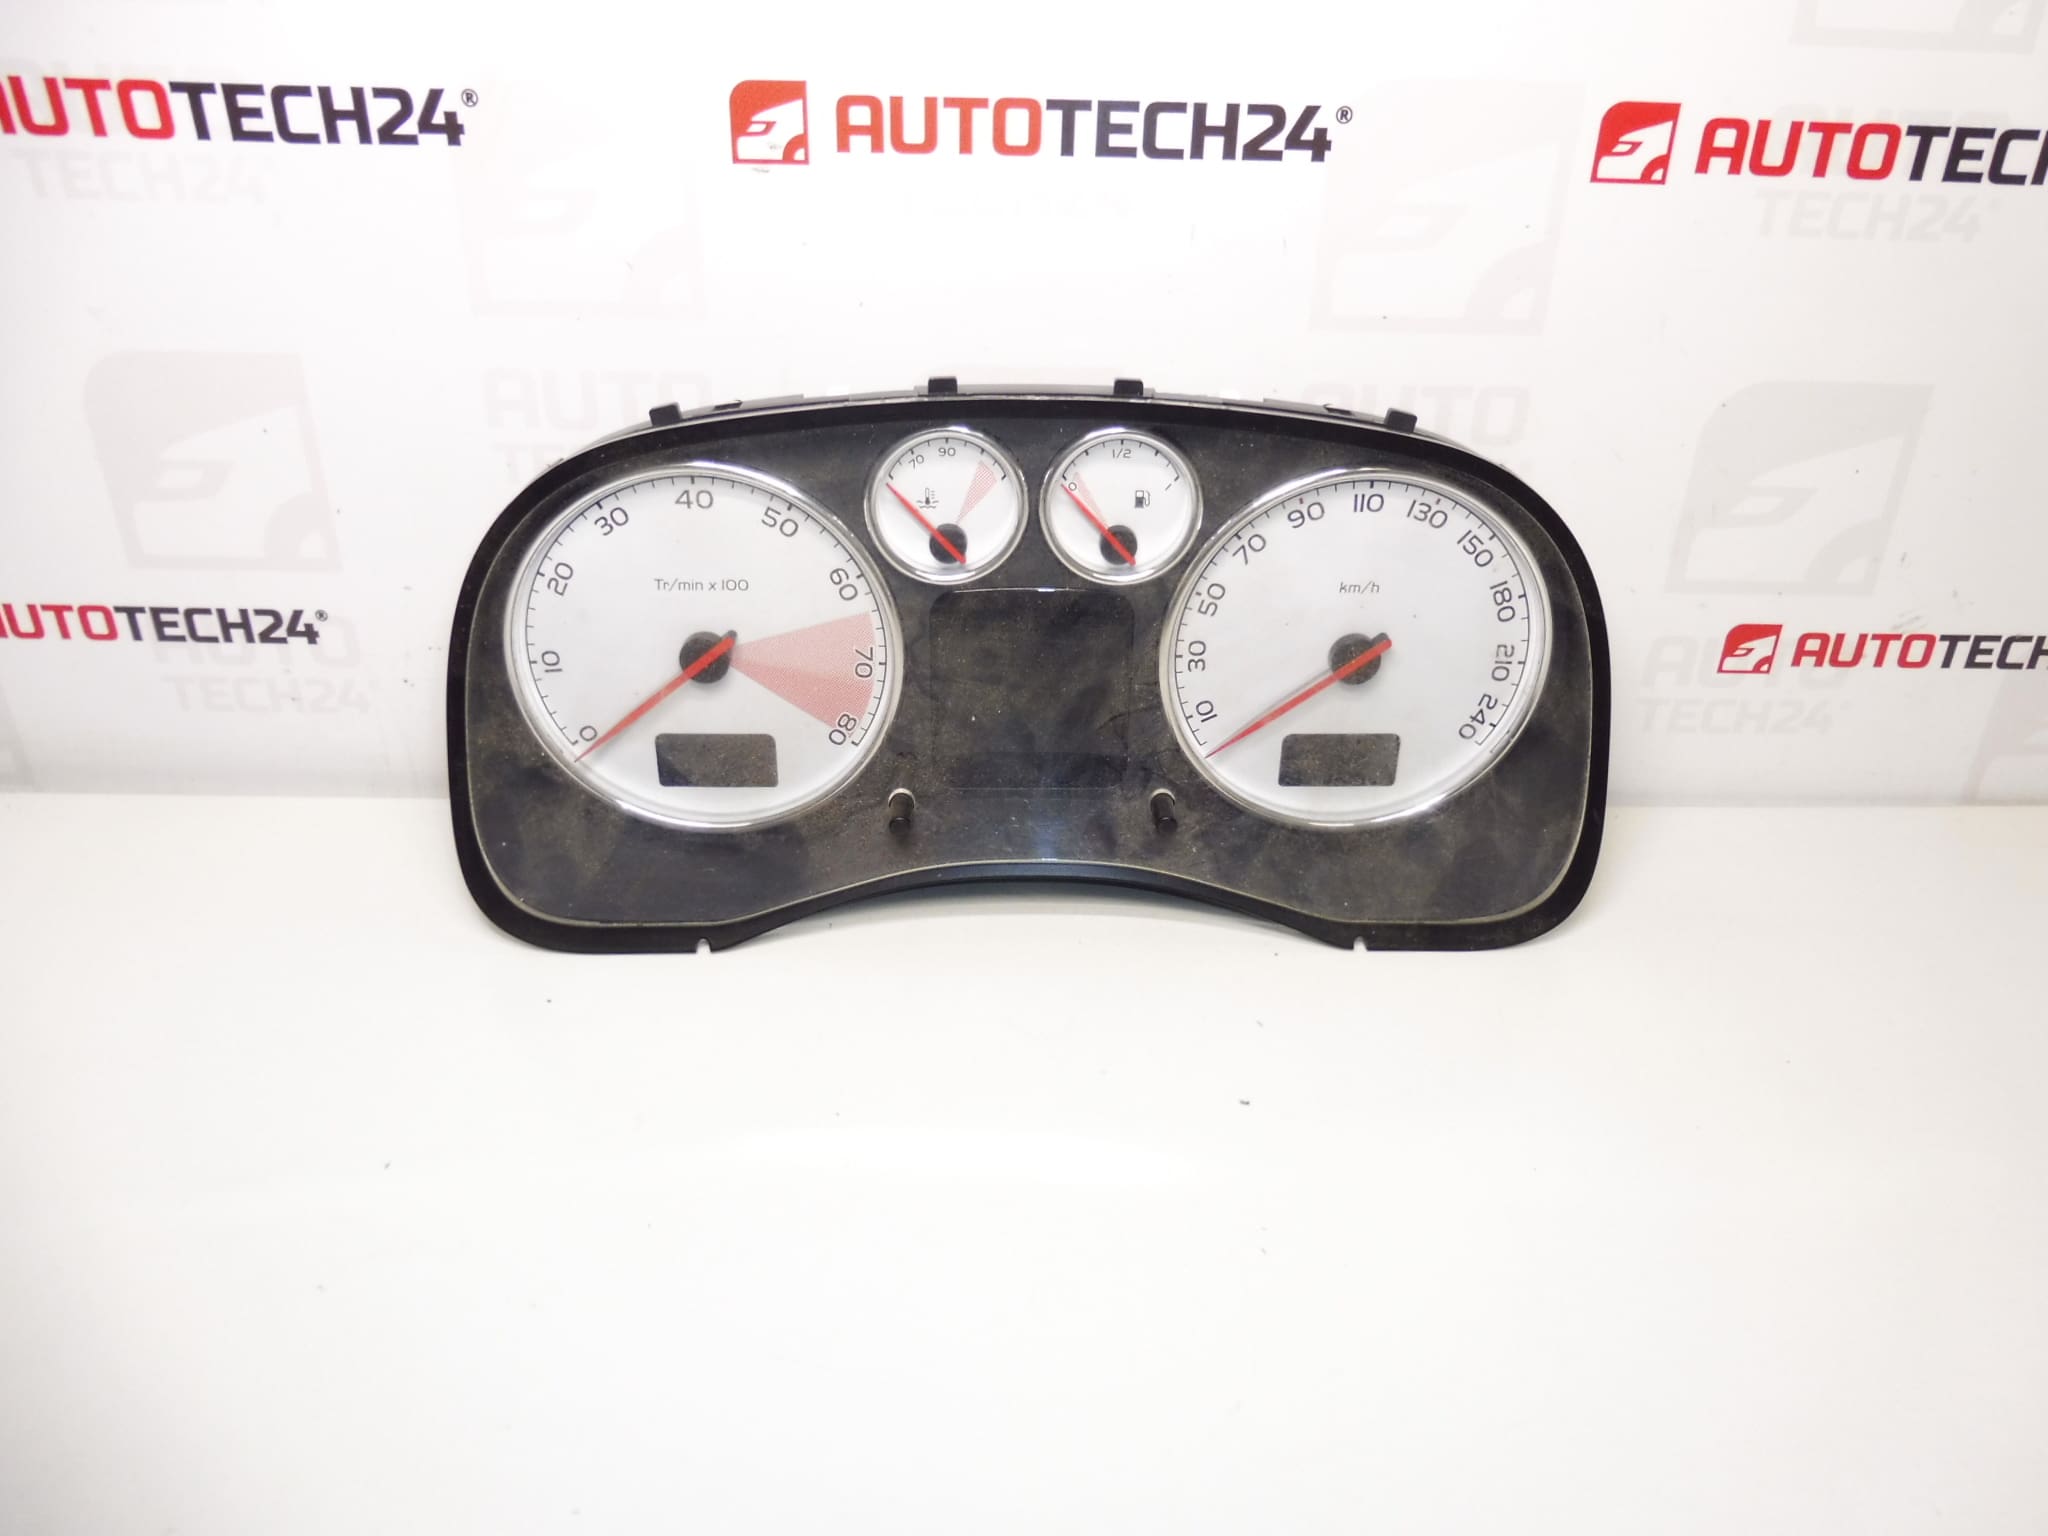
Speedometer for PEUGEOT 307 and 307 CC cars with 2.0 16V engine
From a vehicle with 184,000 km
Part description
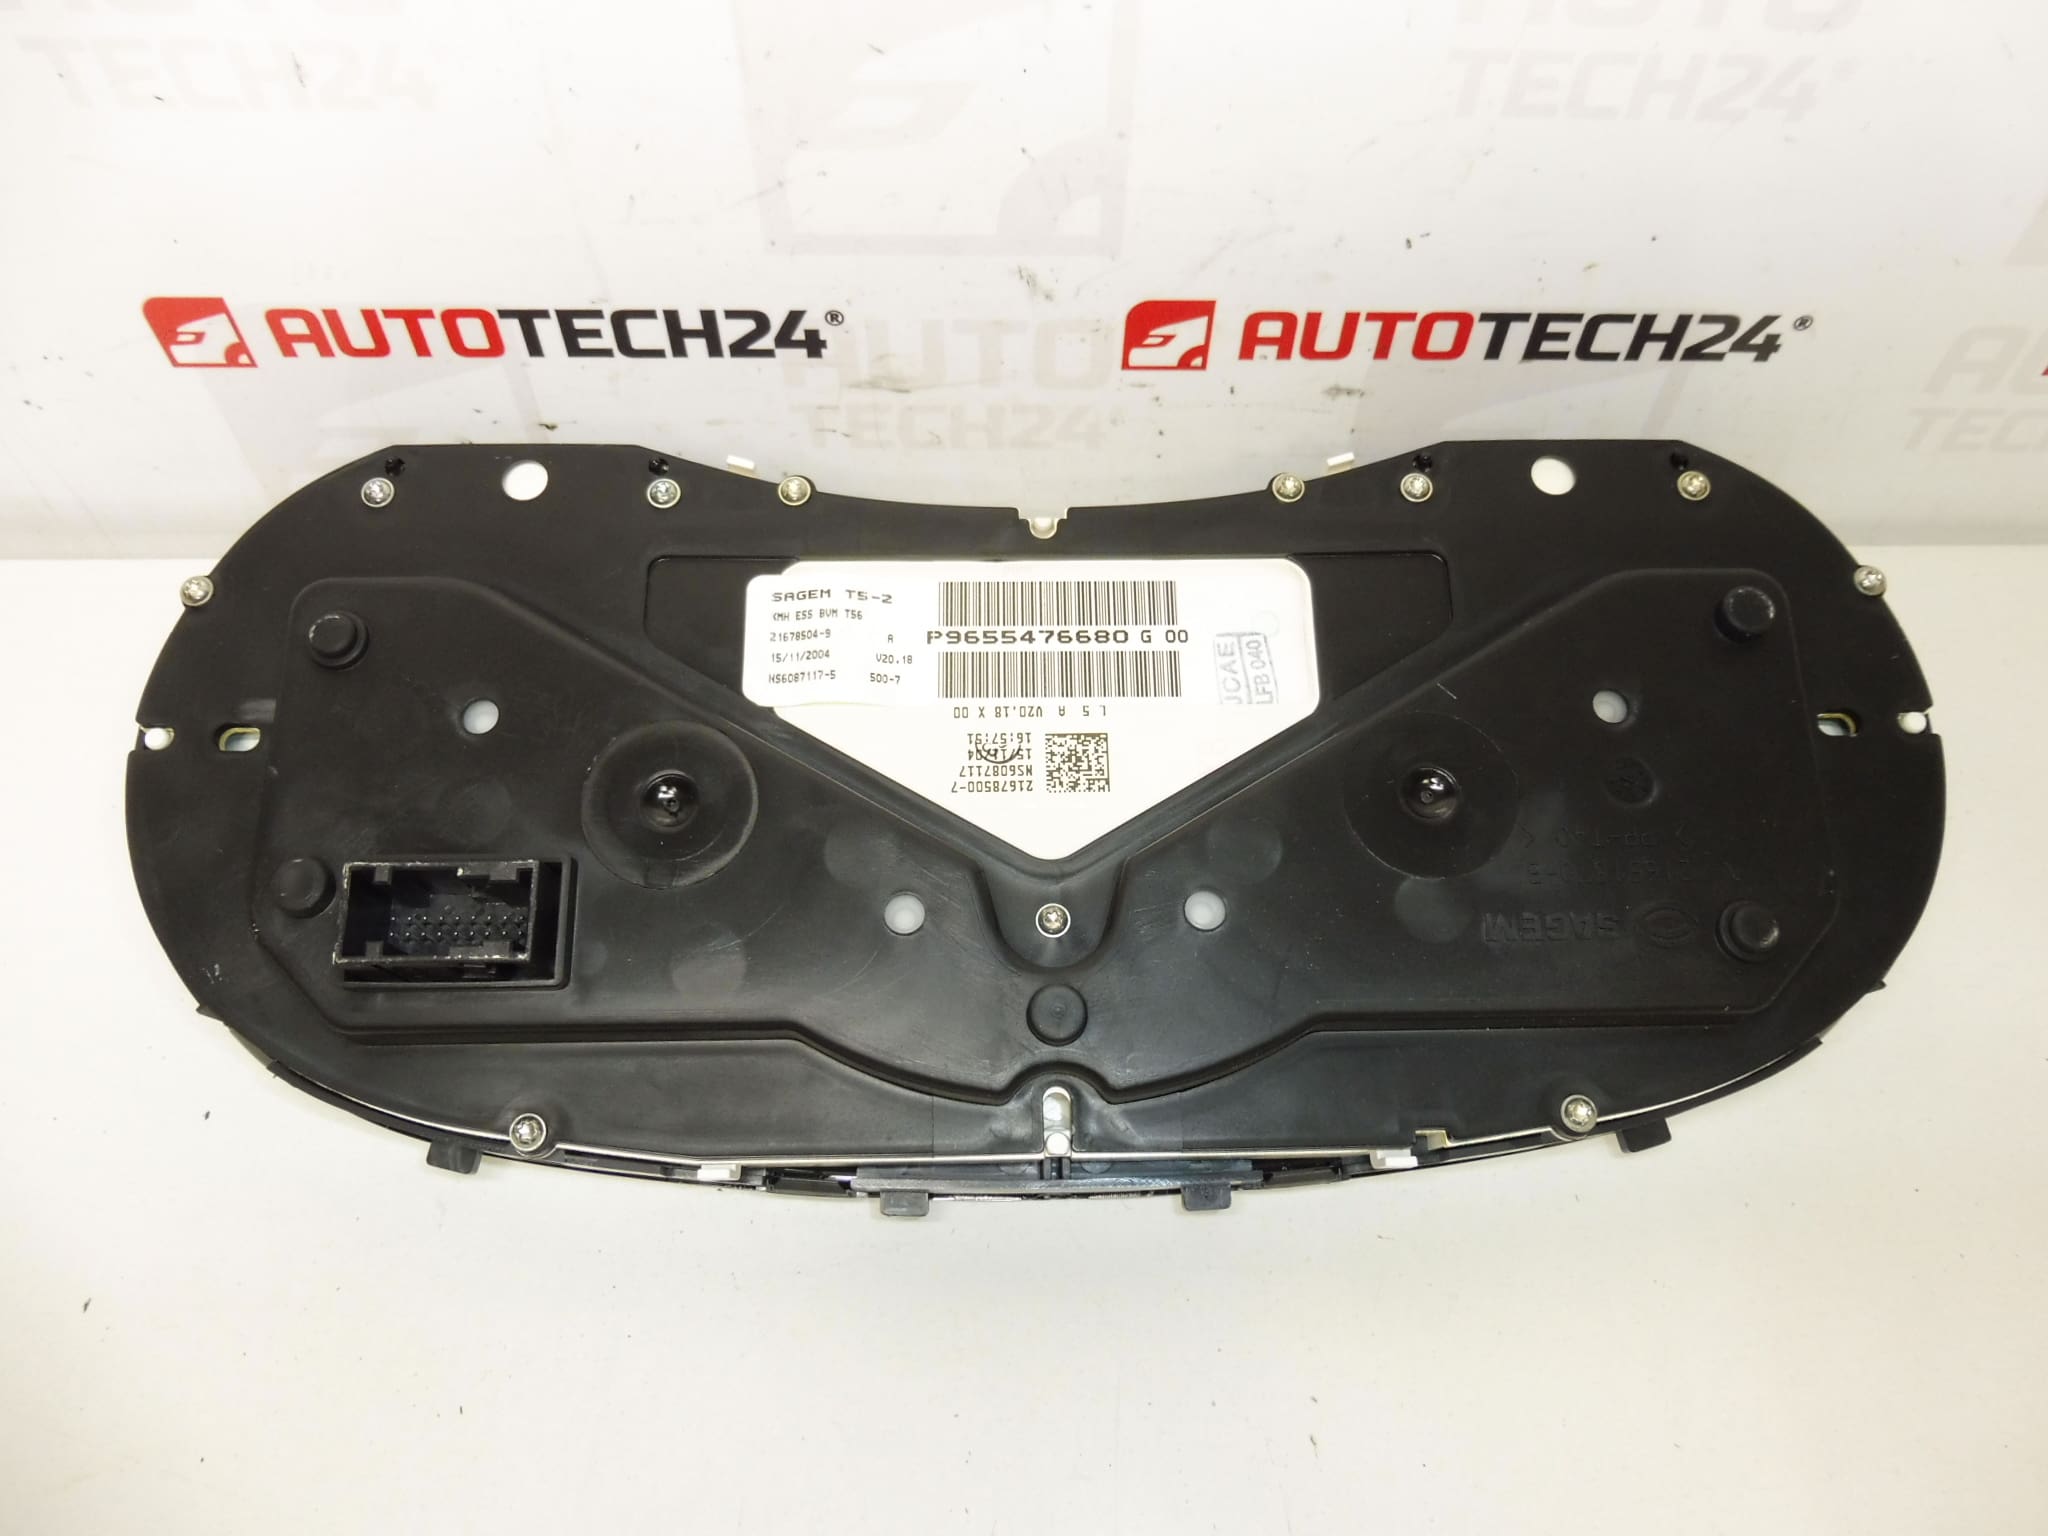
Original used tachometer (dashboard) designed for Peugeot 307 / 307 CC. It is a part from the category of electrical components that displays speed, distance traveled (run-in) and typically also other operational information depending on the car’s equipment. This piece comes from a car with a declared mileage of 184,000 km, which is important to take into account when exchanging (the mileage status can be stored in the instrument panel / system of the car depending on the version).
If you are looking for a tachometer by part number, in the description below you will find all the codes listed, including variants from the label (OEM/PSA markings) to make identification as quick as possible.
Technical information
- Manufacturer: Stellantis (Citroën/Peugeot – PSA)
- Model: Peugeot 307 / 307 CC (2.0 16V)
- Other numbers: P9655476680, G 00, 6103F4, 6106J1, NFP
Product codes
- Product codes: 9655476680, P9655476680, 6103F4, 6106J1
Installation recommendations
Generally/typically for speedometer (dashboard) replacement, the exact steps may vary depending on the specific equipment and design of the Peugeot 307/307 CC. The procedure below is a practical and safe framework for mounting a used part.
1) Before assembly
- Check the part match against the product codes (9655476680, 6103F4, 6106J1, etc.) and compare them to the old tachometer.
- Visually check the undamaged body of the instrument panel, handles, front cover and especially connectors and pins (no bending, corrosion, breakage).
- Compare whether the new piece has the same connector design and the same layout/mounting type as the original part.
2) Necessary tools and materials
- Basic set of screwdrivers and bits (according to the used connecting material)
- Plastic pry bar for dismantling interior parts (to minimize plastic damage)
- A clean cloth or a mild contact cleaner (if the connectors are dirty)
- Protective gloves
3) Step-by-step assembly procedure
- Secure the vehicle against movement and turn off the ignition.
- Disconnect the battery (typically the negative terminal) and wait a few minutes for the car’s systems to sleep.
- Remove the surrounding dash covers/panels in the instrument shield area (use a plastic pry bar and feel).
- Undo the tachometer fasteners and carefully slide the instrument panel into the access position.
- Disconnect the electrical connectors: first unlock the connector fuses, then pull the connector out without prying the wiring.
- Remove the original tachometer and prepare a new piece next to it to compare the connectors and mounts.
- Connect the connectors to the new speedometer – push them in as far as they will go and check for proper locking.
- Set the tachometer in its original position so that there is no tension in the wiring anywhere.
- Install the tachometer fasteners.
- Put back all the removed covers/panels.
- Connect the battery.
- Turn on the ignition and verify that the instrument panel starts normally and the backlight works.
-
4) Post-assembly checks and test drive/function verification
- Verify that the tachometer displays speed smoothly and without dropouts.
- Check the function of the backlight, indicator lights and other displayed data depending on the equipment.
- After a short drive, check again that nothing vibrates and that the instrument panel is firmly seated.
5) The most common assembly mistakes + how to avoid them
- Battery not disconnected: can lead to wiring errors or warning lights – always disconnect the battery first.
- Unsocked connectors: cause backlight failures or non-functioning indicators – the connector must be secured with a fuse.
- Plastic damage when removing covers: use a plastic pry bar and do not pull “with force”.
- Ignoring code match: for instrument panels, identification by part number is key – compare 9655476680/6103F4/6106J1 with the old part.
Reasons why the part is damaged
- Cold connections and tired electronics in the instrument panel (backlight outages, irregular behavior of indicators).
- Voltage fluctuations in the on-board network (weak battery, poor charging, transient resistances) stress the tachometer electronics.
- Oxidation or contamination of connectors – can cause intermittent contacts and incorrect display.
- Mechanical damage during unprofessional disassembly/assembly (broken handles, cracked cover, damaged pins).
- Vibrations and long-term stress in the interior – they can gradually affect the contacts and joints.