Description
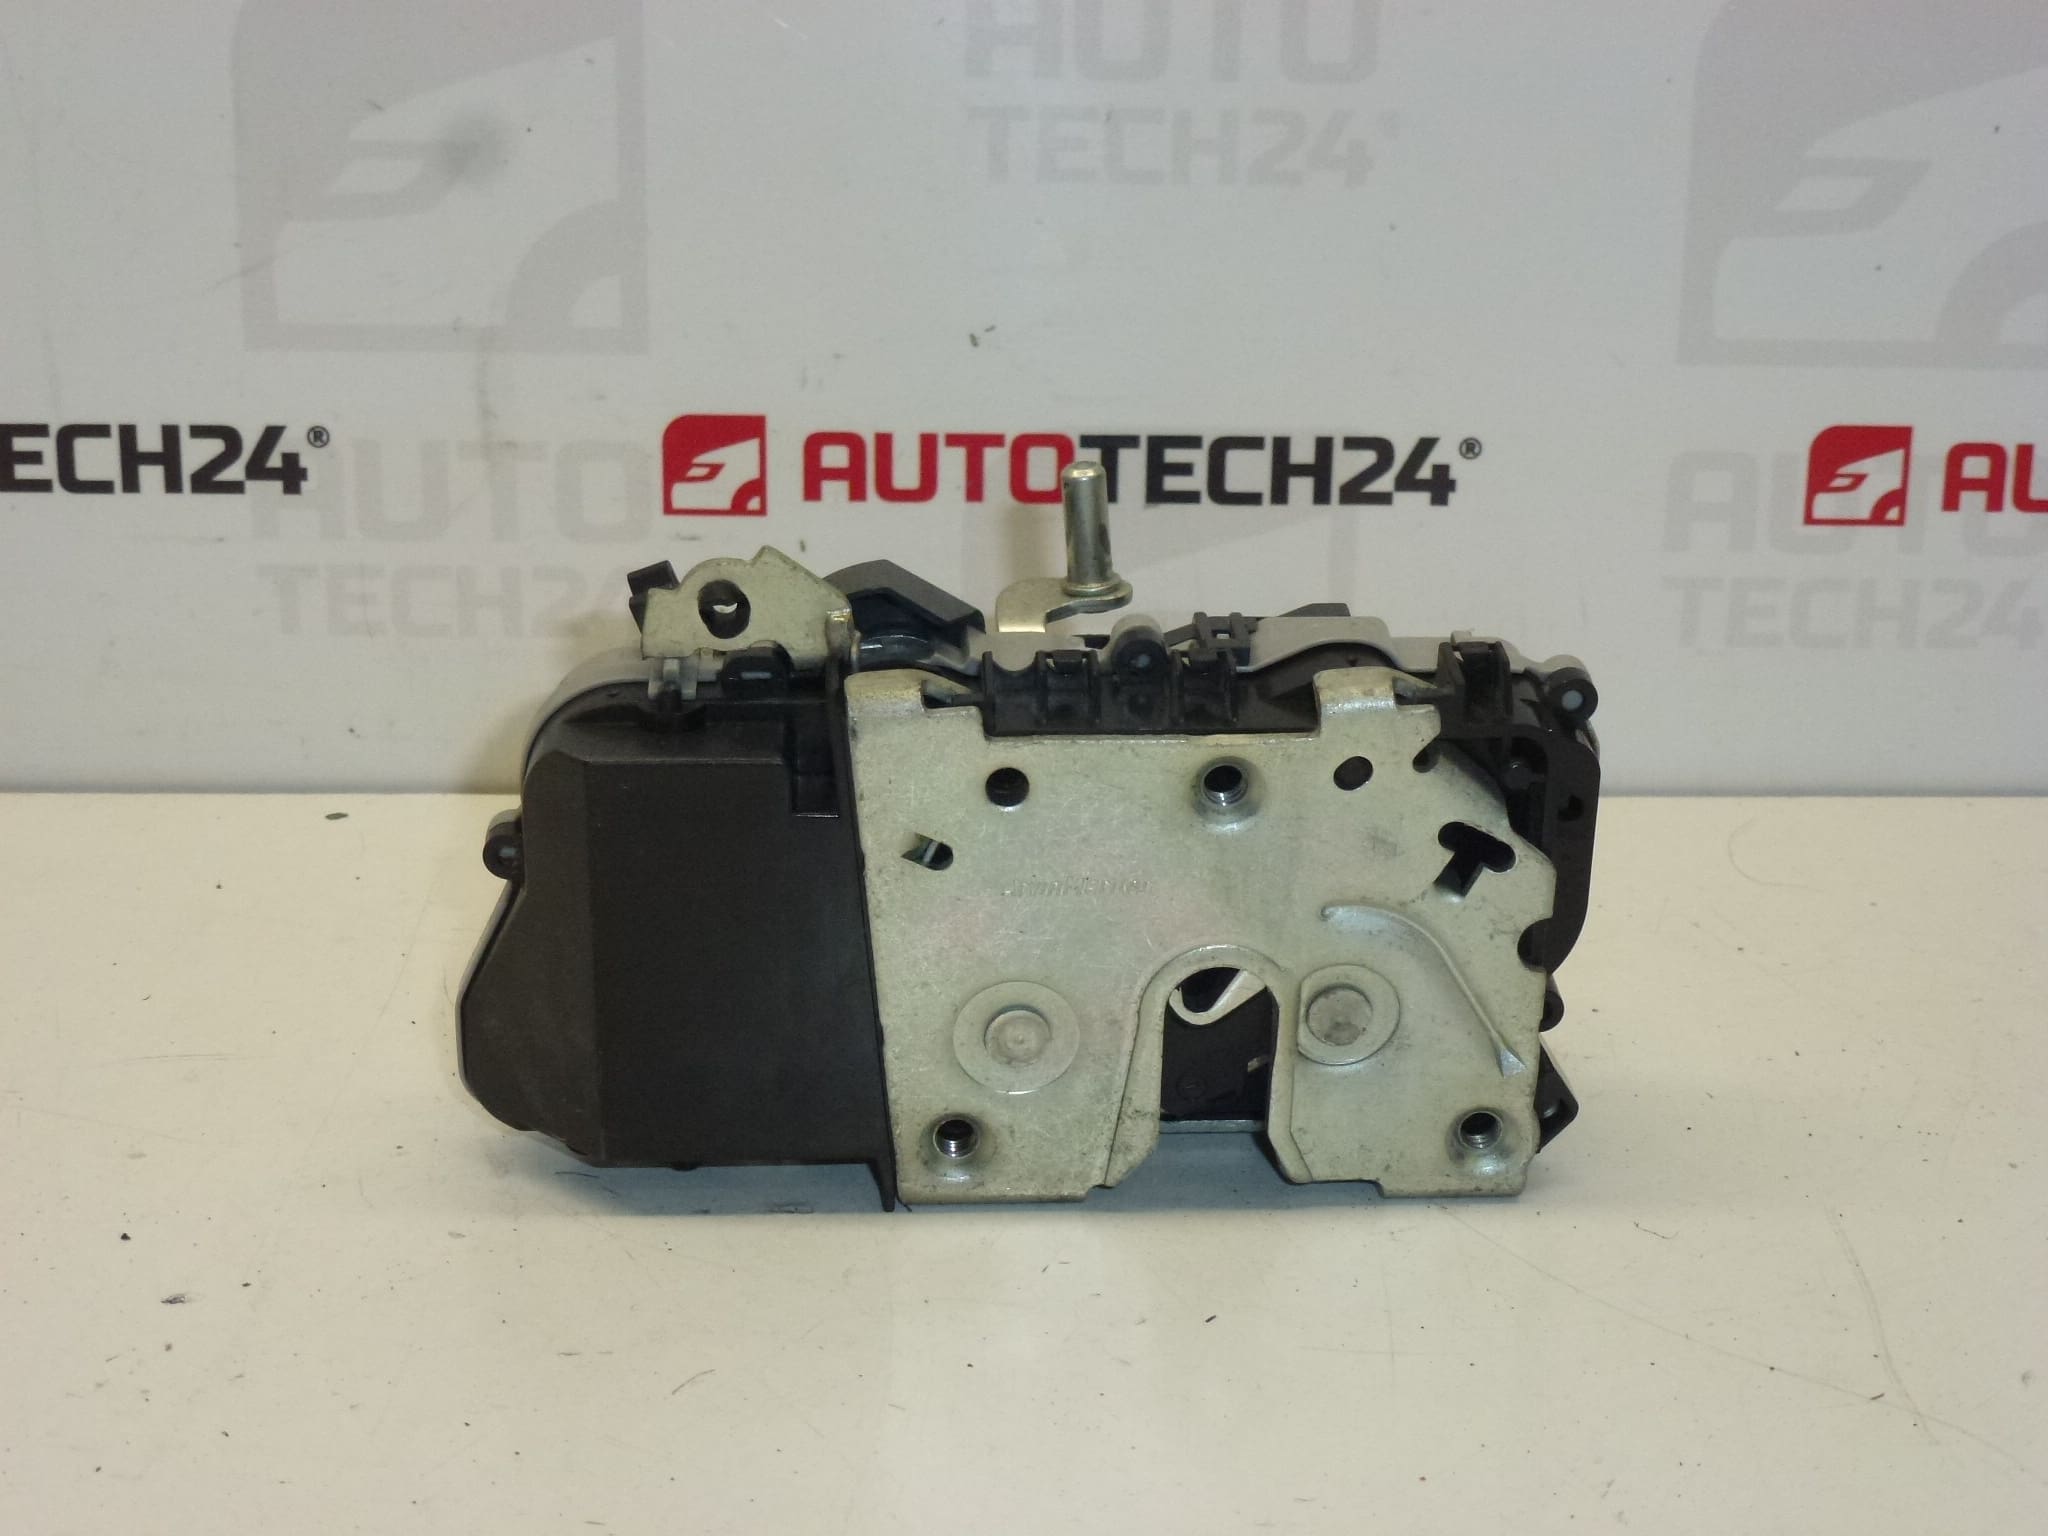
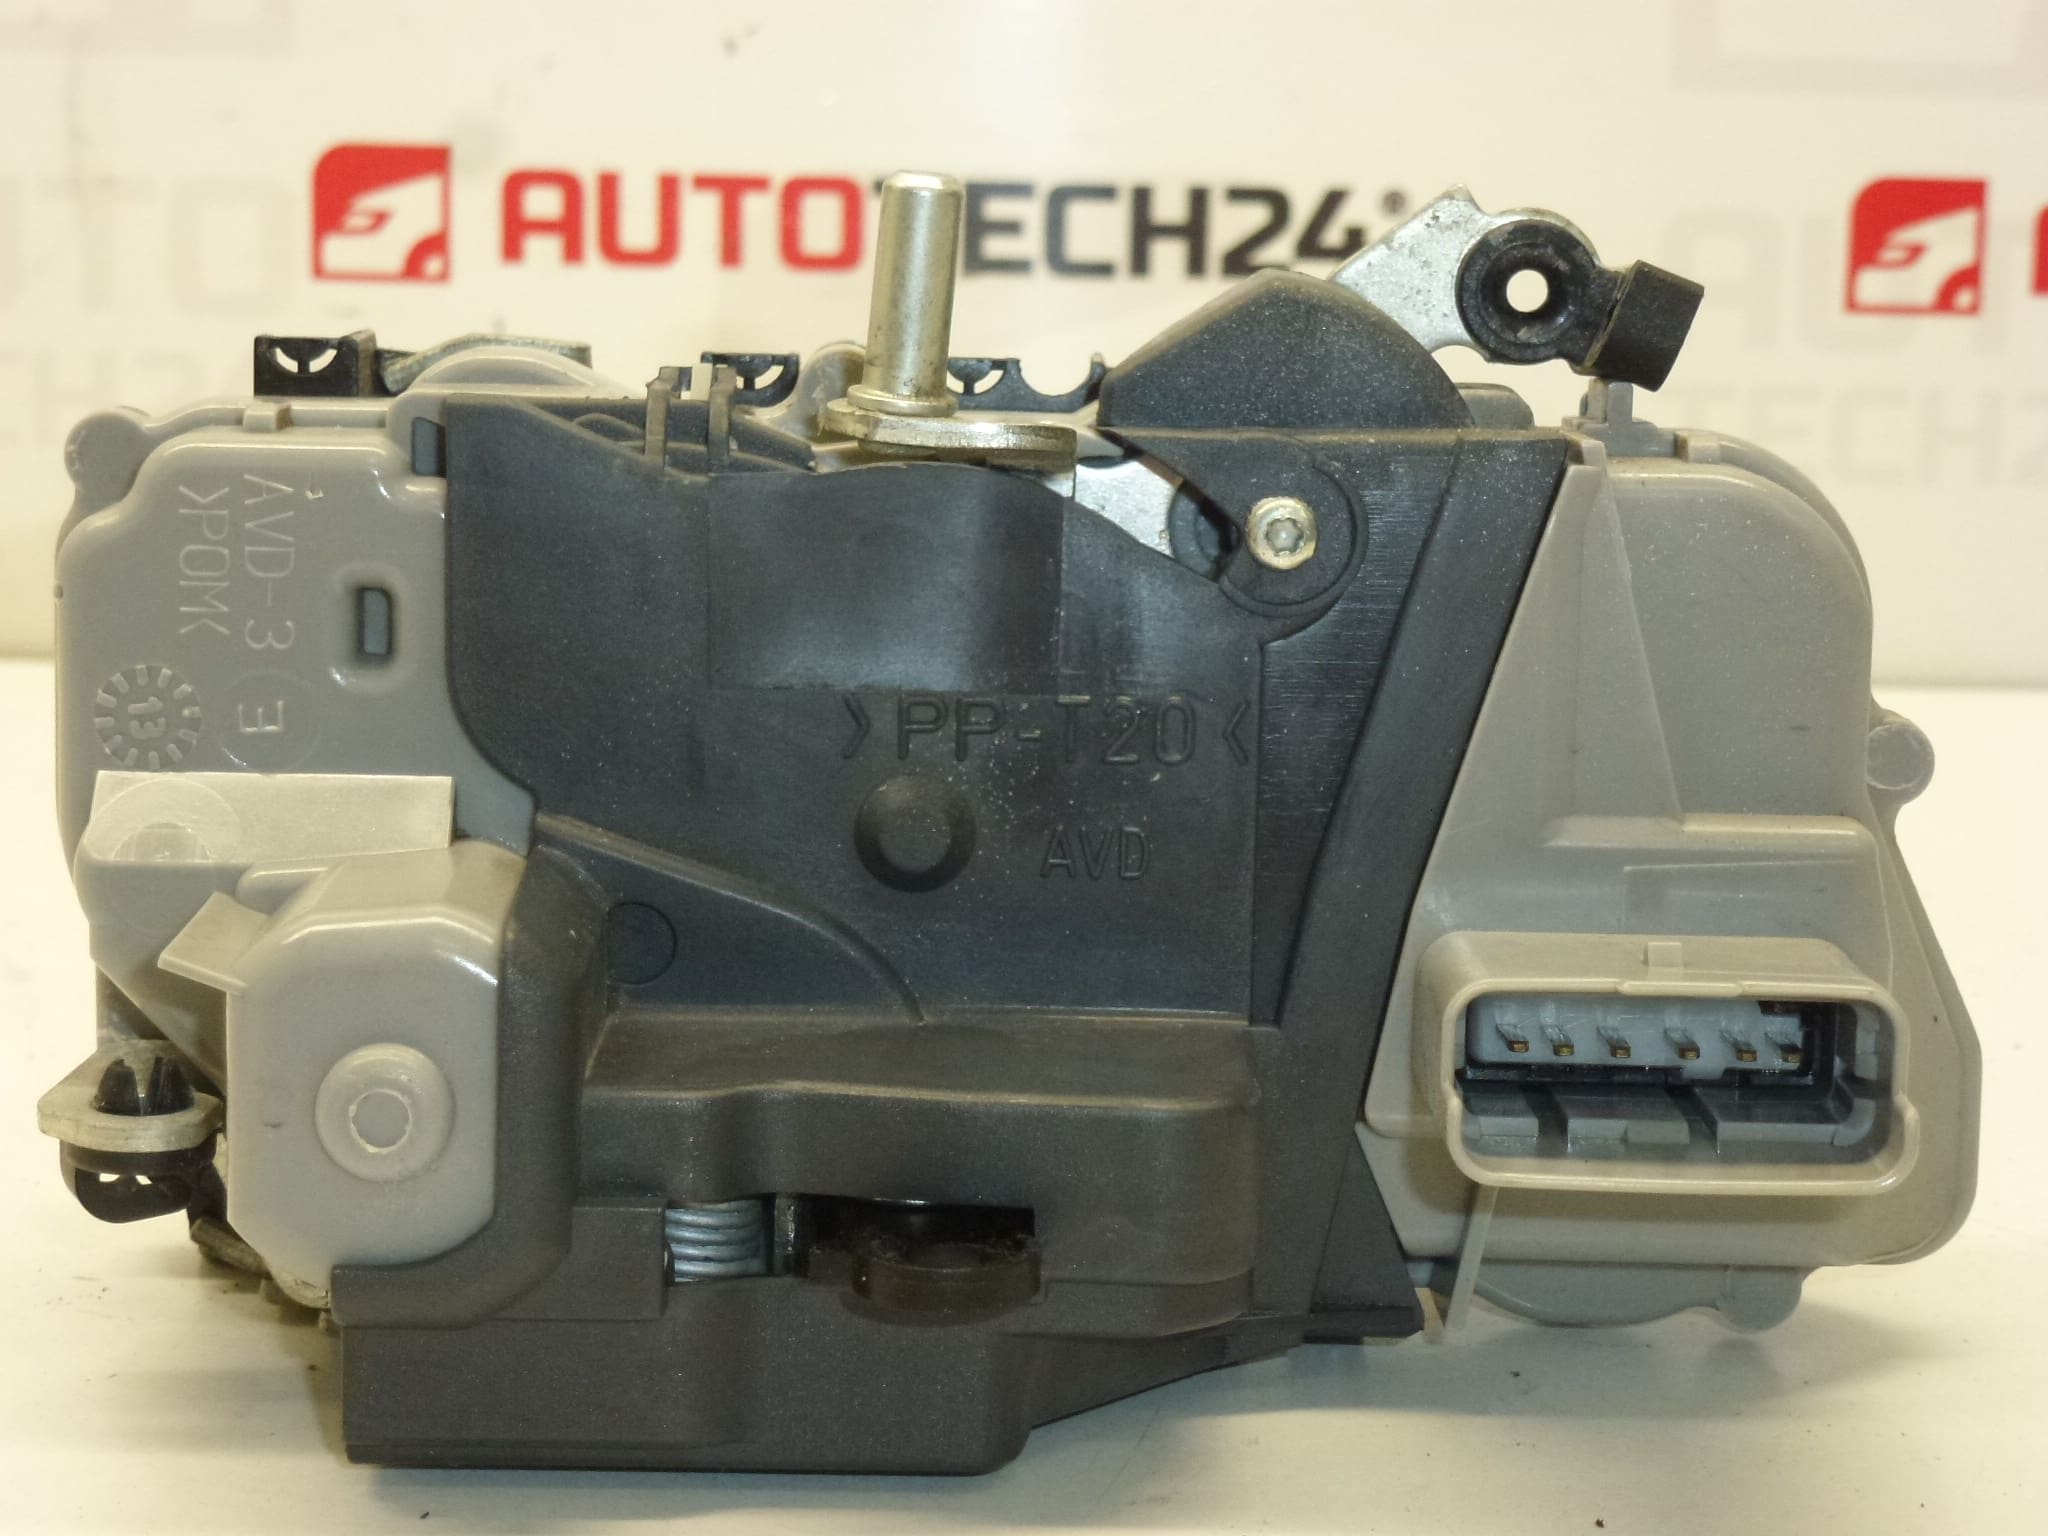
Electric central locking lock for the right front door Citroën Xsara Picasso. Make sure you have the same oval connector as shown in the photo. Used part, fully functional, tested. Front Passenger Door.
Product Overview
This electric door lock/central locking actuator is designed for the Right Front (Passenger) door of the Citroën Xsara Picasso. The mechanism combines the latch and the electric actuator that operates the central locking system. The unit is commonly searched by part number (9136J3) and is suitable for mechanics and competent DIY enthusiasts who perform door repairs and central locking replacements.
Compatibility And Fitment
Fits Citroën Xsara Picasso passenger front door. Confirm Compatibility By Visual Inspection Of The Connector: The Unit Uses An Oval Electrical Connector (compare With Photo). This Part Is Suited For Vehicles Equipped With Central Locking Where The 9136J3 Lock Assembly Is Specified.
Technical Information
- Manufacturer: Stellantis (Citroën / Peugeot)
- Model: Citroën Xsara Picasso
- Product Codes: 9136J3
- Additional Numbers: NFP; Connector Type: Oval Connector
Replacement Procedure
- Disconnect Battery: Always Disconnect The Negative Battery Terminal Before Starting To Avoid Short Circuits And Prevent Damage To Electrical Components.
- Remove Door Trim: Carefully Remove Door Trim Panel, Starting With Trim Clips And Screws. Keep Track Of Fasteners.
- Remove Moisture Barrier: Peel Back The Inner Plastic Or Foam Moisture Barrier To Access The Lock Mechanism.
- Disconnect Linkages And Connector: Detach Mechanical Linkages (Door Handle And Lock Rods) And Unplug The Oval Electrical Connector.
- Unbolt Lock Assembly: Remove The Mounting Bolts/Screws Securing The Lock Inside The Door Cavity And Extract The Unit.
- Install New Unit: Position The Replacement Lock, Fasten Bolts To Correct Tightening, Reconnect Rods And Electrical Connector, Refit Moisture Barrier And Door Trim.
- Test Operation: Reconnect Battery And Test Locking/Unlocking Function With Key, Central Lock Button And Interior Handle Before Final Reassembly.
Why The Part Commonly Fails
- Wear And Tear: Repeated Use Causes Mechanical Wear Of Latch Components And Plastic Gears Inside The Actuator.
- Moisture Ingress And Corrosion: Water Penetration Into The Door Cavity Leads To Corrosion Of Metal Parts And Electrical Connector Problems.
- Actuator Motor Failure: Electric Motor Or Internal Gear Damage Causes Loss Of Locking Function.
- Broken Linkage Or Clips: Mechanical Rods Or Plastic Clips Can Break, Preventing Proper Operation.
- Connector Corrosion Or Wiring Faults: Poor Electrical Contact Can Lead To Intermittent Or Permanent Failure.
Installation Recommendations
- Use Appropriate Tools And Keep Fasteners Organized.
- Apply Dielectric Grease To Electrical Connector Contacts To Reduce Corrosion Risk.
- Lubricate Latch Mechanism With A Light Lithium Or Graphite-Based Grease After Installation.
- Verify Smooth Mechanical Movement Of Linkages Before Final Reassembly Of The Door Panel.
- If You Are Unsure About The Procedure, Seek Assistance From A Professional Workshop.
Note About The Part
Used Part, Fully Functional, Tested As Stated In The Original Description. Verify That The Connector Shape Matches Your Vehicle (Oval Connector) Before Installation.