
Description
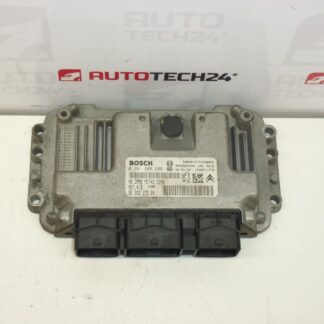
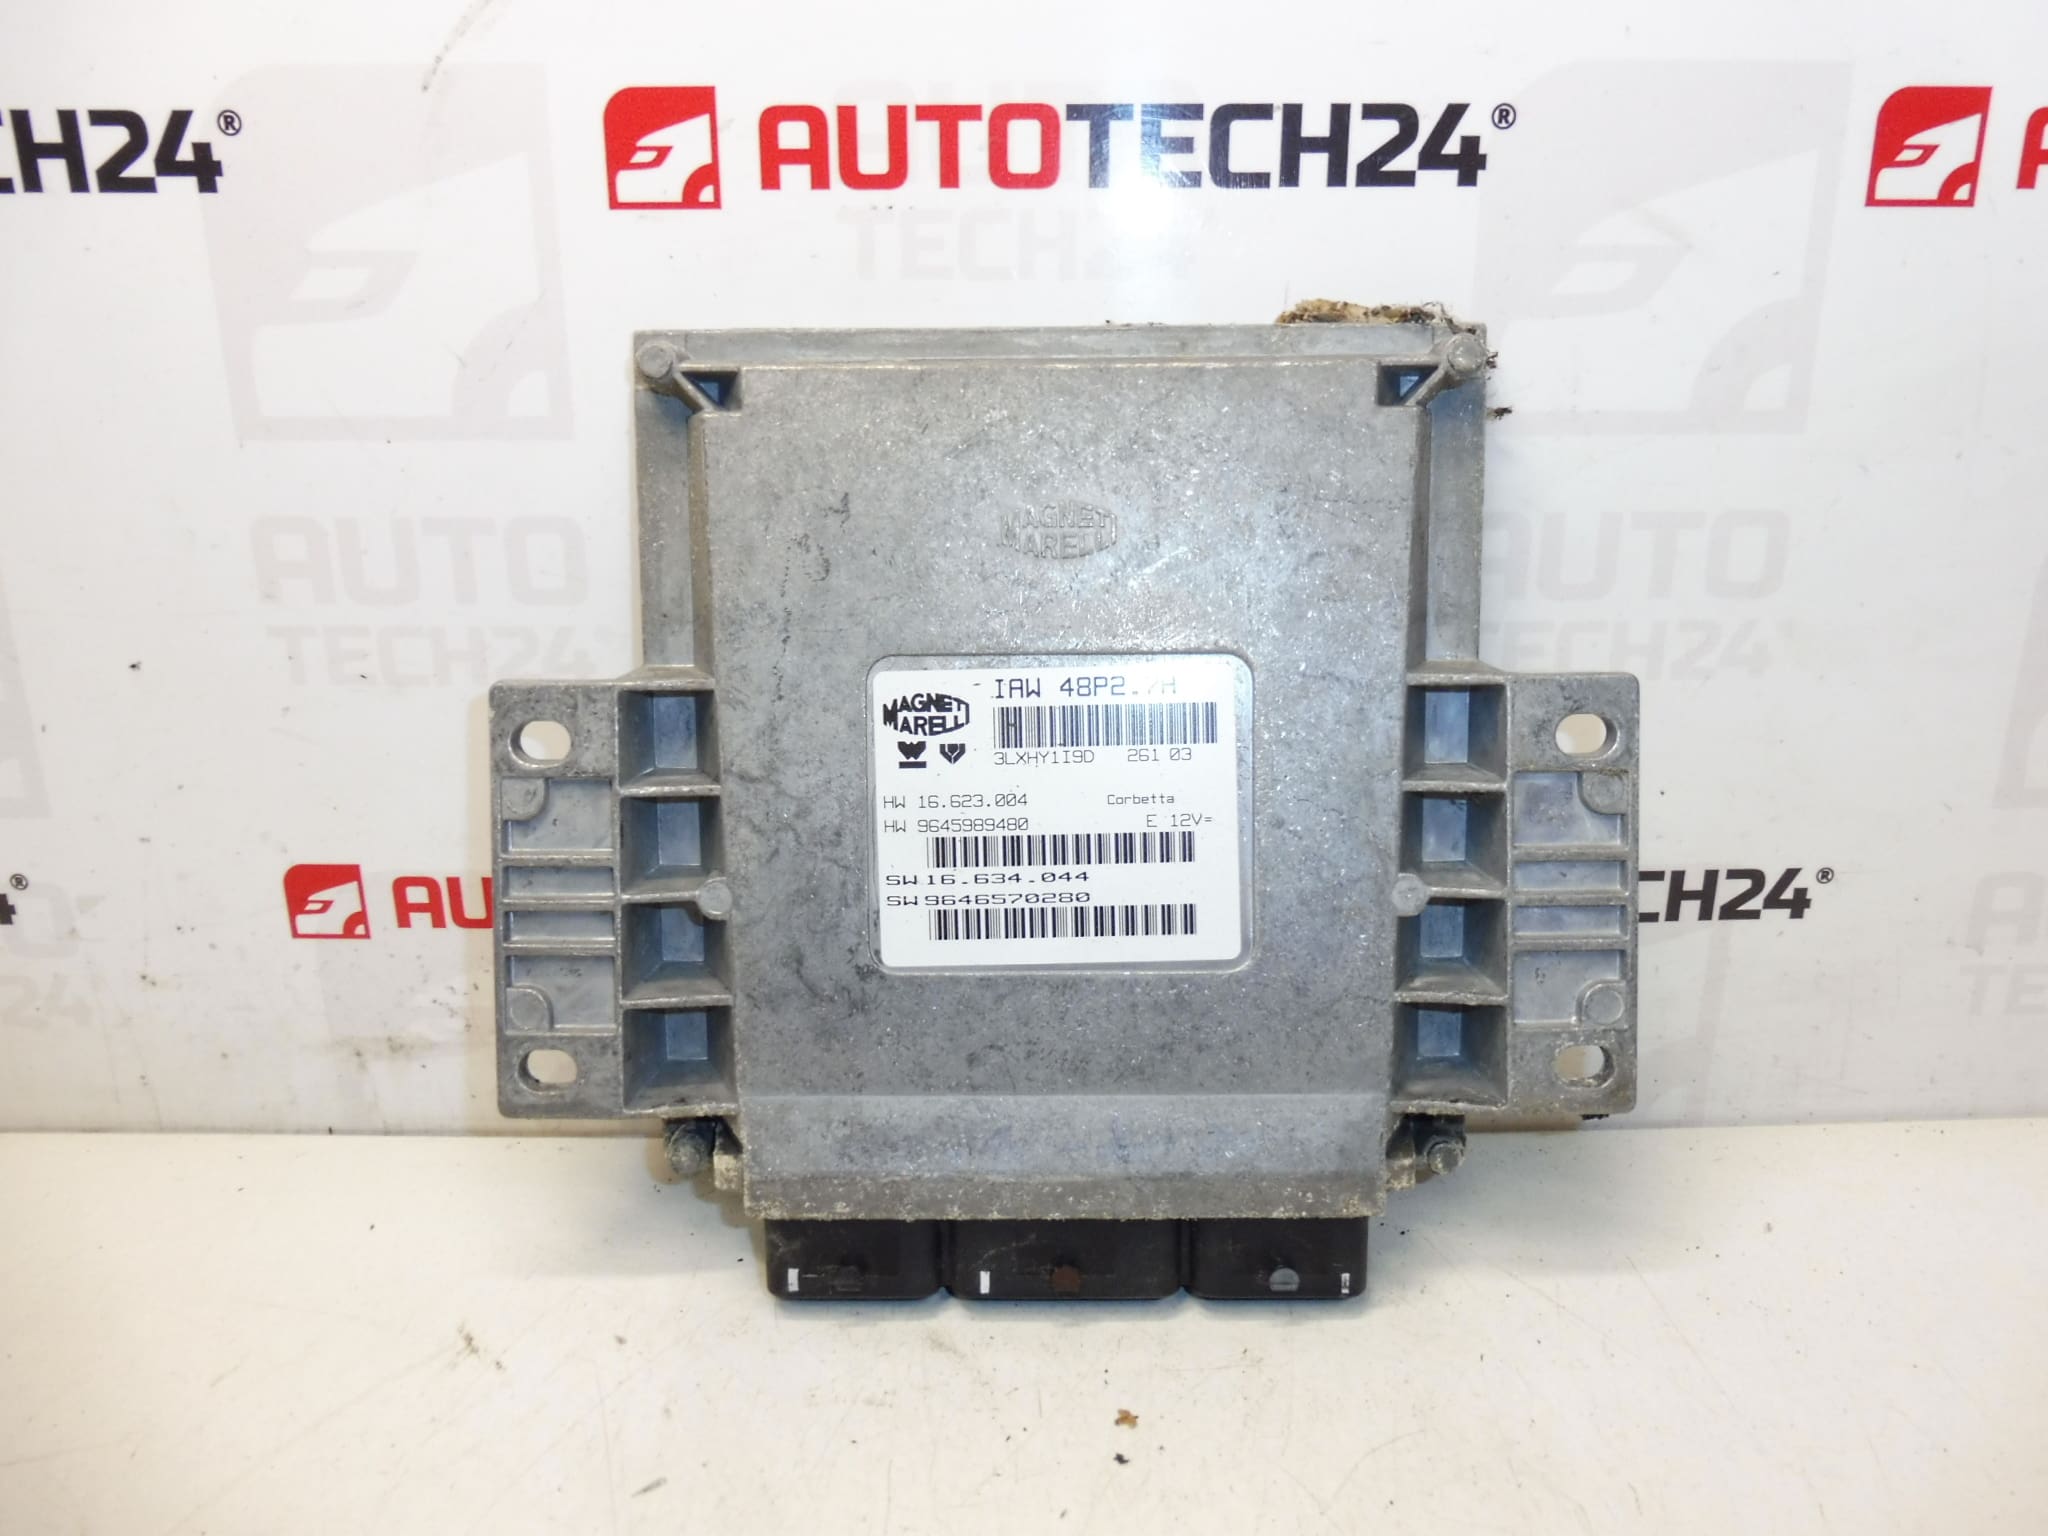
Control unit MAGNETI MARELLI IAW 48P2.7H
From a CITROEN C2 1.1i
Part description
This injection control unit is a used original auto part for Citroën and Peugeot cars from the Stellantis group. The MAGNETI MARELLI IAW 48P2.7H unit is searched primarily by manufacturer designation and part codes, which makes it easier to find the right part when repairing engine electronics failures.
The part comes from a Citroën C2 1.1i. For auto mechanics and home repairers, it is especially important to compare the markings directly on the label of the original unit. For used control units, the correct matching of codes is essential for trouble-free further processing and assembly.
Technical information
- Manufacturer: MAGNETI MARELLI
- Model: IAW 48P2.7H
- Other numbers: 9646570280, 9645989480, 1938VY
Product codes
- Product codes: IAW 48P2.7H, 9646570280, 9645989480, 1938VY
- Models from labels/backgrounds: Citroën C2, Citroën C3
Installation recommendations
This part is an injection control unit. The procedure below is based on general practice for this type of work; the exact steps may vary depending on the specific car and system design.
1) Before assembly
- Check that the manufacturer designation, unit model and all codes on the label match the old part.
- Inspect the connectors, pins and packaging of the unit for mechanical damage, oxidation or contamination.
- Compare the attachment points, connector shape and overall design with the old piece.
- Before starting work, disconnect the battery and wait until the electrical system is completely disconnected.
2) Necessary tools and materials
- Basic set of hand tools
- Screwdrivers and socket wrenches of common sizes
- Cleaning agent for electrical contacts
- A dry cloth or a soft brush for cleaning the surroundings
- Diagnostic equipment suitable for subsequent adjustment of the unit
3) Step-by-step assembly procedure
- Turn off the ignition and safely disconnect the battery.
- Access the original control unit according to the car design.
- Before disassembly, clean the area around the unit to prevent dirt from getting into the connectors.
- Carefully disconnect the electrical connectors without using excessive force.
- Unmount the old unit and remove it.
- Compare the old and new part by label, connectors and mounts.
- Put the used unit in place and fix it in its original position.
- Connect the connectors so that they are properly seated and secured.
- Reconnect the battery.
- Perform a basic power and communication check of the unit.
- If required for the system, provide the necessary software customization or data transfer.
- After completion, verify proper system operation during normal vehicle operation.
-
4) Post-assembly checks and test drive/function verification
- Check that all connectors are firmly seated and nothing is loose.
- Verify that when the ignition is turned on, the unit behaves normally and the system communicates with diagnostics.
- After starting, observe the stability of the engine and any non-standard manifestations.
- After a short test drive, visually check the mounting and connectors again.
5) The most common assembly mistakes + how to avoid them
- Assembly without comparing part codes – always check all label markings beforehand.
- Damage to connectors due to rough handling – disconnect and connect connectors carefully.
- Installation with battery connected – always disconnect vehicle power first.
- Neglecting to clean the contacts – dirt or oxidation can cause malfunction.
- Underestimation of the subsequent setting of the unit – with control units, correct commissioning is often dependent on a professional procedure.
Assembly and Coding – Important
- The unit is used and is “paired” with the original car (VIN/PIN/keys).
- Commissioning options:
- Cloning data from the old drive (EEPROM/Flash) – after the clone, the drive is plug and play.
- Virginization and subsequent initialization/telecoding via DiagBox (possibly online) + customization of keys.
- Recommended to be performed by an expert with PSA service equipment (DiagBox/Lexia/PP2000).
- Always disconnect the battery before disassembly/assembly and follow the manufacturer’s procedure to avoid damaging the unit.
Reasons why the part is damaged
- Moisture and oxidation in the area of connectors or the unit itself.
- Surge in the electrical system or improper handling when connecting and disconnecting.
- Mechanical damage caused by impact, vibration or improper disassembly.
- Contamination of contacts which leads to communication failures and unstable function.
- Unprofessional intervention in the electrical installation or incorrect connection of related parts of the system.