Description
Fan Bracket For Car Radios For Citroën C5 II
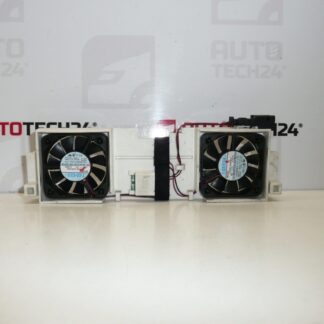
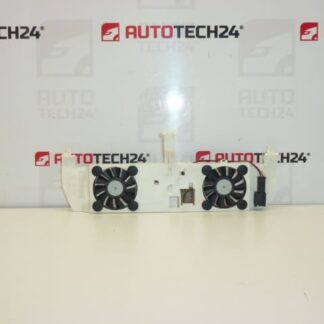
This cooling fan bracket is designed to secure and position the ventilation fan for the factory radio/head unit in Citroën C5 II vehicles. Ideal for professional workshops and DIY mechanics, this part helps maintain proper airflow to the head unit, reducing the risk of overheating and intermittent faults in the radio’s electronics. Commonly searched by part numbers, the bracket is a direct-fit component for affected models and is a practical replacement when mounting points are damaged or the original bracket has deteriorated.
Technical Information
- Manufacturer: Stellantis (Citroën/Peugeot)
- Model: Citroën C5 II
- Product Codes: 9649602680, 6560FK
- Other Numbers: NFP
Functionally, the bracket holds the small cooling fan or vents that keep the head unit electronics within safe operating temperatures. Proper mounting maintains alignment of the fan relative to the radio chassis, ensures steady airflow paths, and prevents vibration transfer that can damage connectors or the radio casing.
Compatibility And Fitment
Intended For Citroën C5 II radio assemblies. Before installation verify that the radio assembly and surrounding trim match the original mounting points. Part numbers listed above are often used when searching for the correct replacement; fitment is typically specific to the second generation C5 head unit layout.
Replacement Procedure
Replacement can be performed with basic automotive tools. Typical steps:
- Disconnect Battery Negative Terminal To Prevent Short Circuits.
- Remove Dashboard Trim Surrounding The Radio Carefully Using Trim Tools To Avoid Damage.
- Unscrew And Pull Out The Head Unit Far Enough To Access The Bracket.
- Disconnect Any Fan Or Connector Plugs Associated With The Bracket.
- Unfasten The Old Bracket From The Radio Chassis And Install The New Bracket In The Same Orientation.
- Reconnect Fan Wiring, Test Operation Of The Fan And Radio Before Reassembling Trim.
- Reinstall Head Unit And Trim, Ensure All Clips And Screws Are Secure.
Installation Recommendations
- Use Plastic Trim Removal Tools To Avoid Scratching Dashboard Surfaces.
- Keep Fasteners And Clips Organized; Replace Any Broken Clips To Ensure A Secure Fit.
- Check Fan Connector And Wiring For Corrosion Or Damage; Repair Faulty Connectors Before Final Assembly.
- Test Fan Operation And Radio Function With The Unit Partially Installed To Confirm Correct Installation.
- Do Not Over-Torque Fasteners; Use Manufacturer Torque Specs Where Available.
Common Failure Reasons
The bracket itself commonly fails due to age-related plastic fatigue, repeated vibration, or impact during previous repairs. Heat exposure from prolonged use of the radio and surrounding electronics can accelerate material degradation. Broken mounting tabs or cracked plastic are the usual symptoms, which lead to misalignment of the fan, increased noise, reduced cooling efficiency and, in some cases, intermittent radio faults.
Replacing a damaged bracket restores correct fan positioning and airflow, reducing the risk of overheating and extending the service life of the head unit. For workshops and experienced DIYers, this is a straightforward, cost-effective repair that often prevents more expensive electronic failures down the line.