Description
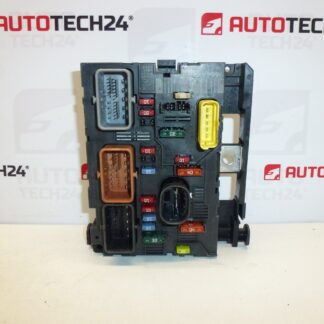
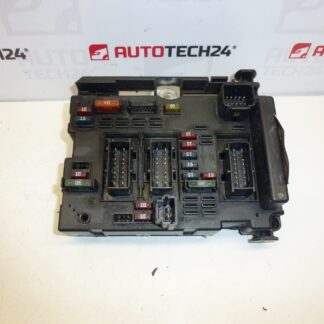
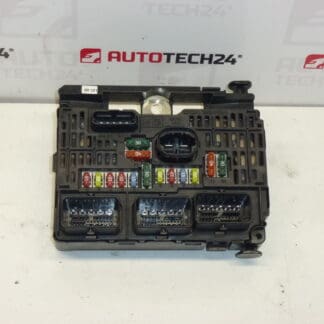
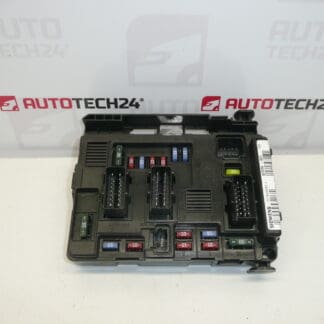
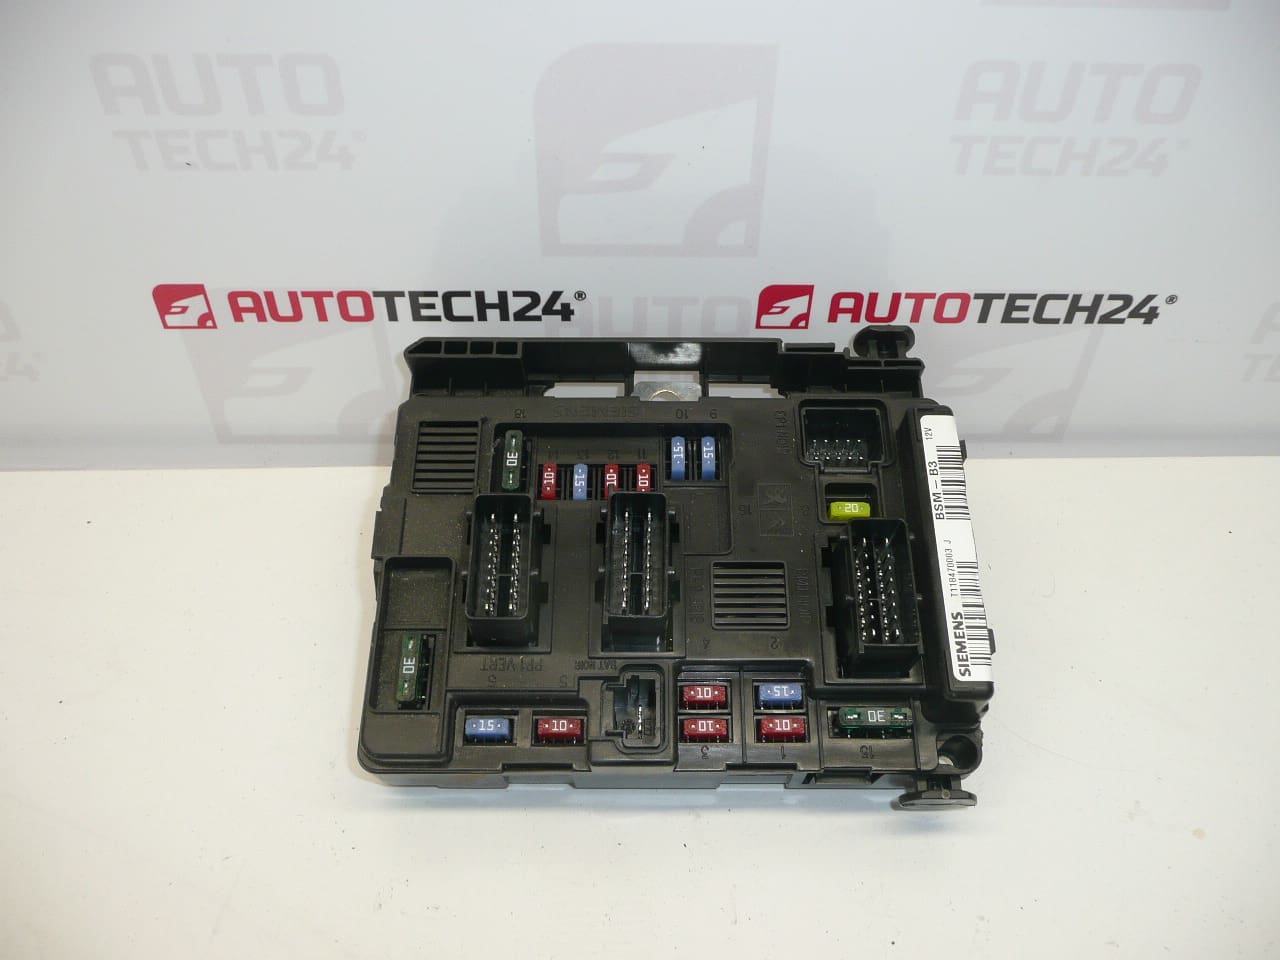
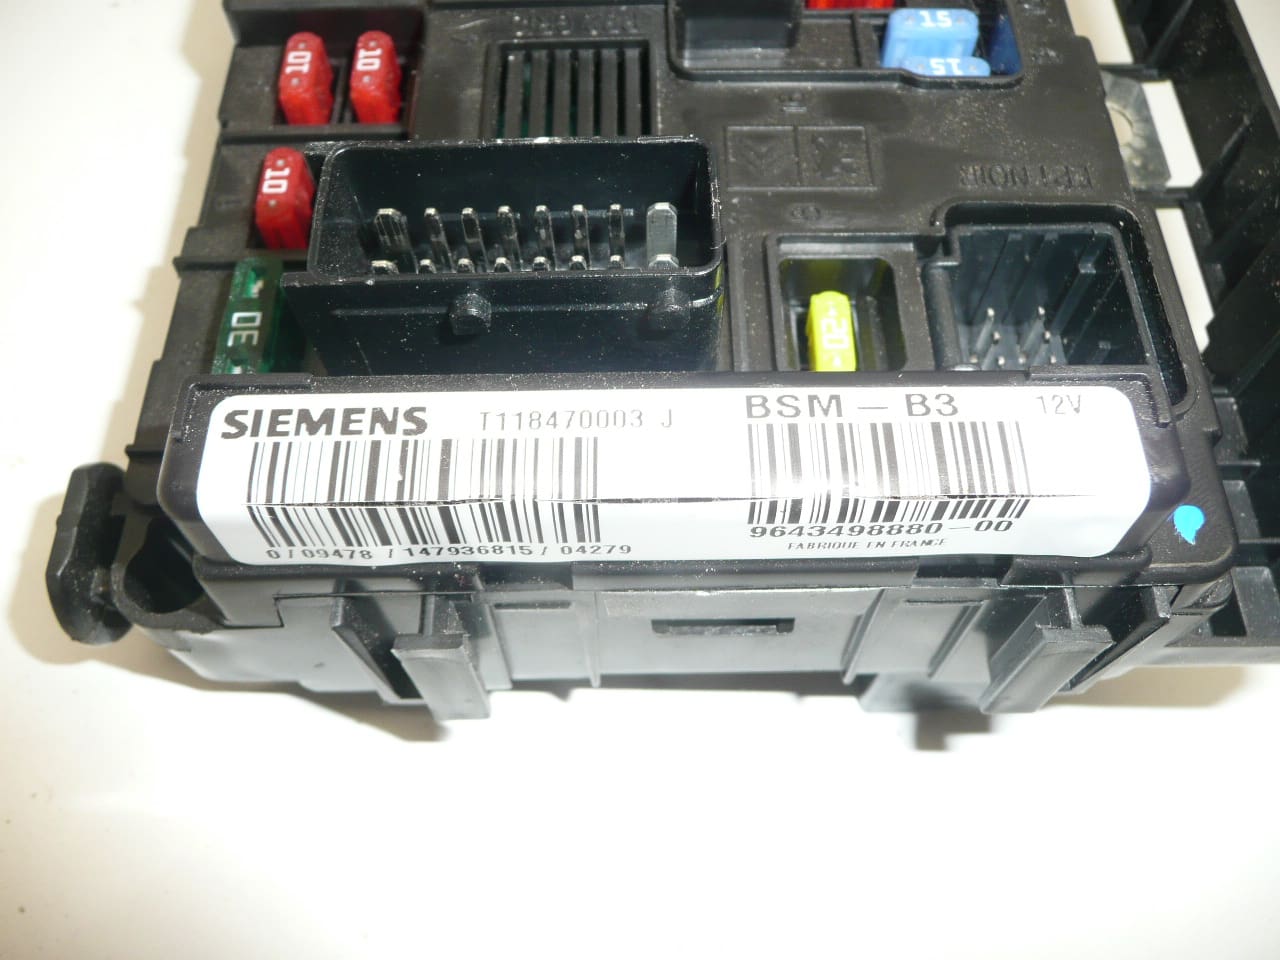
BSM B3 Siemens Citroën Peugeot 9643498880. This is a used part with a functionality warranty. Some mounting tabs may be damaged — this does not affect functionality.
The BSM B3 (Body System Module) from Siemens is a direct-fit used replacement for various Citroën and Peugeot models. As a central body electronics unit, it manages functions such as central locking, interior and exterior lighting circuits, wiper control, and communication with other control modules. Supplied as a functional unit with warranty, this module is a cost-effective option for mechanics and experienced DIYers seeking a reliable replacement part identified commonly by product code 9643498880.
Technical Information
- Manufacturer: Siemens
- Model: BSM B3
- Product Codes: 9643498880; 9643498880-00; T118470003
- Additional Numbers: G J 6500Y3; 6500Y3
- Compatible Models: Citroën Berlingo; Citroën C2; Citroën C3; Citroën C3 Pluriel; Citroën C5; Peugeot 206; Peugeot Partner
Function And Symptoms
The BSM (Body System Module) coordinates multiple body functions: central locking/unlocking, interior and exterior lighting management, wiper and washer control, power window relays (where fitted), and gateway communications on the vehicle network. Common symptoms of a failing BSM include intermittent or complete loss of central locking, erratic lighting behavior, inoperative wipers, blown fuses related to body circuits, or communication errors flagged on diagnostic tools.
Replacement Procedure
General steps for replacement (procedures vary by model and year):
- Disconnect Battery: Always disconnect the negative battery terminal before any work on vehicle electronics.
- Locate Unit: BSM units are typically located behind a trim panel in the engine bay fuse box area or under a dash panel—consult vehicle-specific repair manual.
- Remove Panels: Carefully remove any trim or covers securing access to the module.
- Unplug Connectors: Release locking clips and unplug electrical connectors. Inspect connectors and wiring for corrosion or damage.
- Fit Replacement: Install the replacement BSM, secure mounting points, and reconnect all connectors firmly.
- Reassemble: Replace any trim and reconnect the battery.
- Verify Operation: Check all related functions (locking, lights, wipers) and scan for diagnostic trouble codes.
Installation Recommendation
Always follow the vehicle manufacturer’s service manual for access and removal steps. Disconnect the battery before starting and avoid shorting pins or connectors. After fitment, verify operation of all body systems and clear any stored fault codes with a suitable diagnostic tool. Some vehicles require adaptation or configuration of the module to the vehicle network; for these tasks, use experienced personnel and PSA diagnostic equipment (DiagBox/Lexia/PP2000) when necessary.
Why This Part Fails
BSM failures commonly result from electrical stress, water ingress, corrosion of connectors, thermal cycling, or damage to wiring harnesses. Physical damage to mounting tabs or clips is cosmetic and usually does not affect module functionality, but damaged connectors or water penetration can cause intermittent faults or complete failure.
Notes For Mechanics And DIYers
- This unit is supplied used but with a functionality warranty as stated above.
- Inspect connector pins and housing for corrosion before installation; repair any wiring faults to prevent repeat failures.
- When diagnosing body electrical issues, check fuses, relays and grounding points as these can mimic BSM faults.
Keywords
BSM B3, Siemens BSM, 9643498880, Citroën BSM, Peugeot BSM, Body System Module, Body Control Module, replacement module