Description
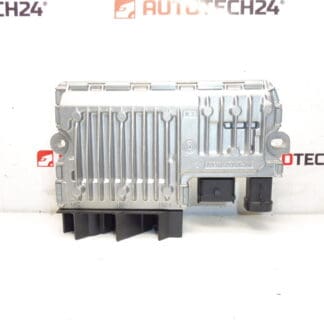
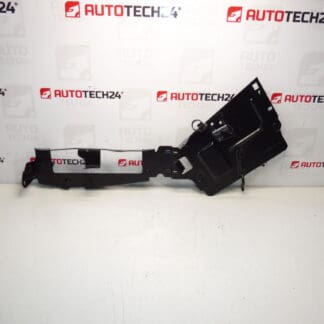
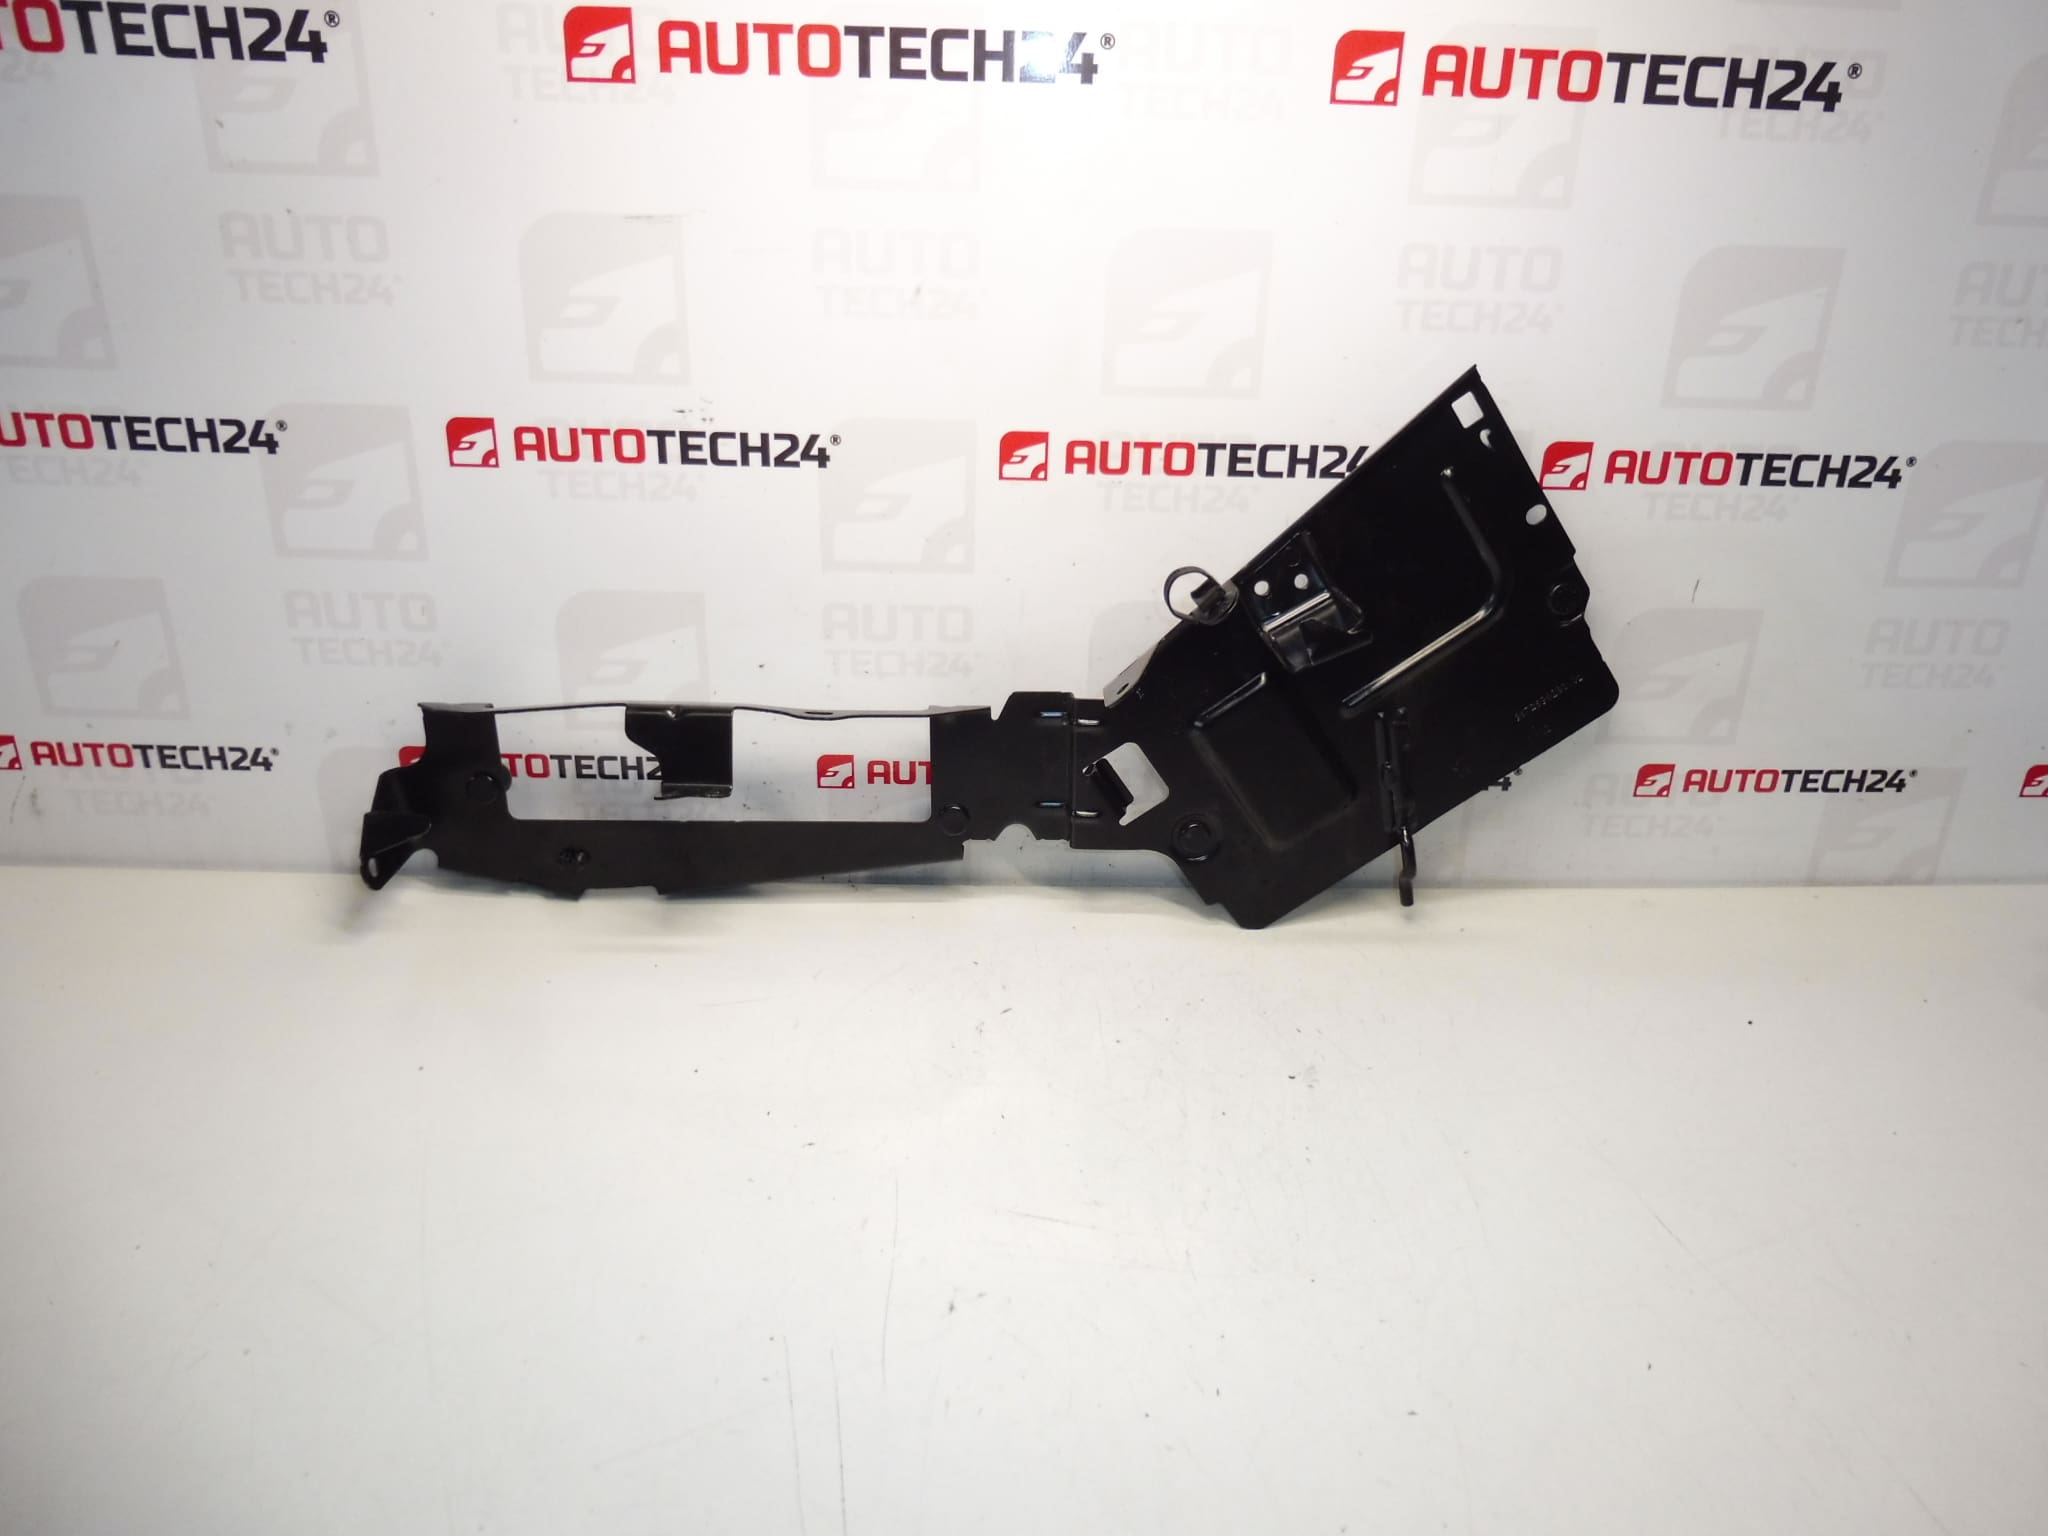
START/STOP Unit Bracket For Citroën, Peugeot And DS Vehicles
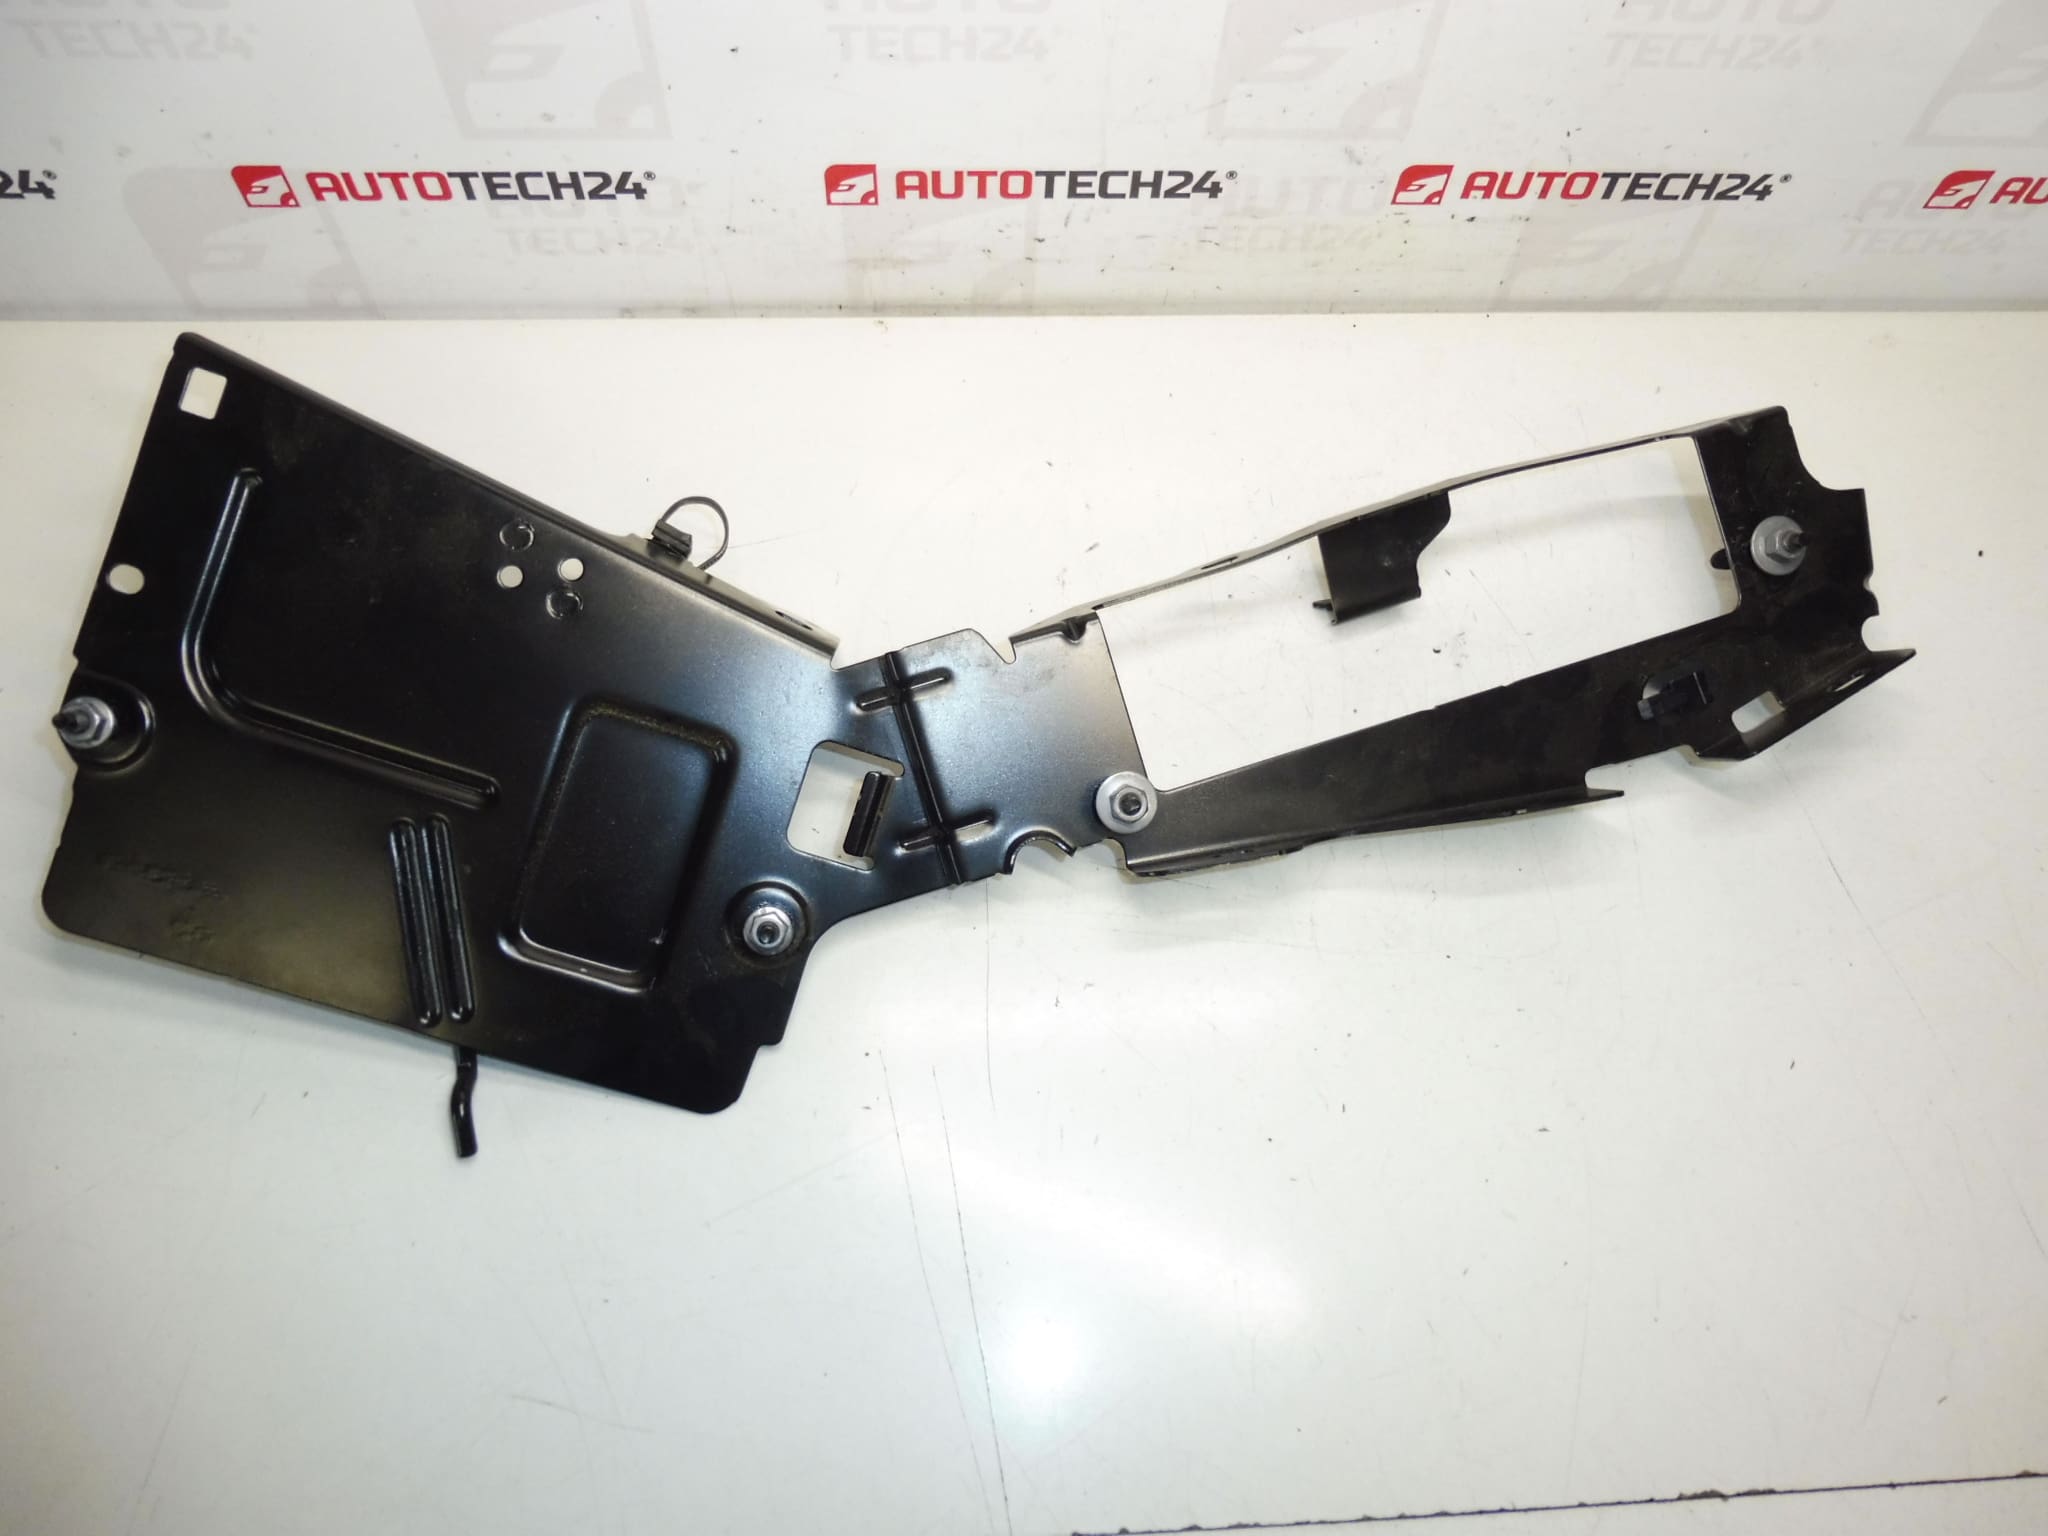
This START/STOP unit bracket is a direct-fit mounting component designed for Citroën, Peugeot and DS models. It secures the Start/Stop control module in the vehicle, reducing vibration and preventing connector stress that can lead to intermittent faults. Often searched by OE number 9672696280, this part is intended for professional workshops and experienced DIY enthusiasts performing electrical module replacement or repairs.
Key Features And Benefits
- Direct-fit bracket matched to OEM mounting points for secure installation.
- Protects the Start/Stop control unit from mechanical stress and vibration.
- Helps maintain correct alignment of electrical connectors to prevent poor contact.
- Durable construction suitable for the engine bay or dashboard mounting locations.
- Useful spare when replacing a Start/Stop module after service or collision repair.
Compatibility
Compatible With (Examples): Citroën Berlingo (B9), Citroën C4, Citroën C4 Picasso, Citroën DS range, Peugeot 208, Peugeot 308, Peugeot Partner III. Always check the OE number 9672696280 against the vehicle’s parts list when selecting the correct bracket.
Installation Recommendation
For Safe And Reliable Fitting:
- Disconnect The Negative Battery Terminal Before Starting Work To Avoid Short Circuits.
- Remove Trim Panels Or Covers To Access The Start/Stop Module Area. Keep Fasteners Organized.
- Unplug Electrical Connectors Carefully—Use A Small Flat Tool If Clips Are Stiff, Avoid Pulling On Wires.
- Unbolt The Old Bracket, Inspect Fixing Points For Damage Or Corrosion, And Clean Mounting Surfaces.
- Fit The New Bracket In The Correct Orientation, Secure Fasteners Evenly, And Reconnect The Module And Connectors.
- After Reassembly, Reconnect The Battery And Verify Start/Stop Functionality And That No Warning Lights Are Present.
- If The Vehicle Requires Module Reprogramming After Replacement, Use Appropriate Diagnostic Tools As Specified By The Manufacturer.
Why This Part Fails Most Often
The bracket itself is a passive component and rarely wears out from normal use. Common Causes Of Failure Or Replacement Include:
- Impact Damage From Collisions Or Minor Accidents That Deform Mounting Points.
- Plastic Degradation Or Brittle Clips Due To Age And Heat Cycling, Leading To Cracks Or Breakage.
- Corrosion Or Contamination At Fasteners Causing Poor Retention.
- Improper Previous Repairs Or Missing Fasteners Resulting In Vibration And Connector Stress.
- Water Ingress Or Interior Leaks Affecting Nearby Modules, Prompting Removal And Replacement Of The Bracket During Repairs.
Technical Information
- Manufacturer: Stellantis (Citroën / Peugeot)
- Model: Citroën Berlingo B9; Citroën C4; Citroën C4 Picasso; DS Models; Peugeot 208; Peugeot 308; Peugeot Partner III
- Product Codes: 9672696280
- Other Numbers: —
Additional Notes
This bracket is intended to restore factory mounting integrity when replacing a Start/Stop control module. Inspect surrounding harnesses and module connectors for signs of wear while performing the replacement. If any doubts arise during installation, consult a qualified technician with experience on Citroën/Peugeot systems.