Description
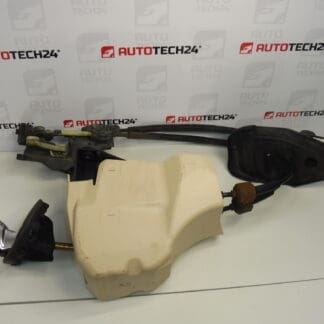
Complete clutch pedal for various CITROËN, PEUGEOT and other Stellantis models
Including clutch master cylinder
From a vehicle with 84,000 km mileage
Part description
The used clutch pedal mechanism including the clutch master cylinder is intended to replace a damaged or worn assembly. The pedal transfers the driver’s foot movement to the master cylinder, which generates the hydraulic pressure required to operate the clutch. The condition of the mechanism therefore affects how smoothly the pedal moves, its return, and proper clutch disengagement.
An advantage of the part offered is the complete pedal assembly with master cylinder and the stated donor vehicle mileage of 84,000 km. When selecting a part, primarily refer to product numbers 9820886180, 9823113380 and 9830021680 and compare its design with the original part. The model name alone is not sufficient to identify a matching design.
Technical information
- Manufacturer: not specified.
- Model: Citroën Berlingo K9 | FIAT DOBLO III | OPEL COMBO E K9 | PEUGEOT RIFTER | Toyota ProAce City.
- Part type: clutch pedal mechanism with clutch master cylinder.
- Assembly components according to the available information: complete clutch pedal including master cylinder.
- Condition: used auto part.
- Donor vehicle mileage: 84,000 km.
- Other numbers: not specified.
The models are listed according to the labels provided. Specific model years, engine types and design variants are not identified in the available information.
Product codes
- Product codes: 9820886180, 9823113380, 9830021680.
The numbers are used to identify the assembly offered. Compare them with the markings on the original part and the service documentation; the available information does not specify replacement relationships or whether the individual numbers are interchangeable.
Installation recommendations
The following procedure is a general guide to replacing a clutch pedal with a hydraulic master cylinder. The exact steps, access method and bleeding procedure depend on the specific model and vehicle configuration. Follow the manufacturer’s service procedure.
1) Before installation
- Compare the markings, assembly shape, mounting points, hydraulic line connection and the pedal-to-master-cylinder connection with the old part.
- If electrical connectors or sensors are present, also compare their design and mounting.
- Check for cracks, deformation, corrosion, the condition of pins and bushings, excessive play and visible signs of fluid leakage.
- Verify the cause of the original fault. Difficult gear shifting or a pedal that does not return may not be caused solely by this assembly.
2) Required tools and materials
- Standard hand tools suitable for the fasteners used and a torque wrench for tightening according to the service specifications.
- Suitable tools for disconnecting hydraulic connections and bleeding the system, depending on its design.
- Clean plugs, a collection container, lint-free cloths, protective gloves and safety glasses.
- Fluid specified by the vehicle manufacturer and any seals or retaining components, if the service procedure requires their replacement.
3) Step-by-step installation procedure
- Secure the vehicle against movement, switch off the ignition and prepare a clean work area. If the procedure requires disconnecting the battery, follow the manufacturer’s instructions.
- Access the assembly by removing the necessary covers according to the service documentation. Protect nearby surfaces from hydraulic fluid.
- Document the routing of hoses, the position of mounts and retaining clips, and any connectors so the original arrangement can be restored.
- Clean the area around the hydraulic connections. Disconnect the lines using the specified method, catch any fluid that escapes and protect open ends with clean plugs.
- Disconnect any electrical connections and release the assembly’s fasteners and retaining components. Support the part during removal and do not use force.
- Remove the original mechanism and check the condition of the mating surfaces, mounts and surrounding lines. Eliminate any causes that could also damage the replacement part.
- Compare the two assemblies again. Fit the replacement mechanism without applying stress and secure it in the order and manner specified by the vehicle manufacturer.
- Connect the hydraulic line and any connectors. Check that the connections and retaining clips are properly seated; the line must not be kinked, stretched or in contact with moving parts.
- Top up with the specified fluid and bleed the clutch control system according to the service procedure. Prevent air from re-entering the system during the process.
- Check for leaks and ensure the pedal moves freely. Once correct operation has been confirmed, reinstall the removed covers and check that nothing restricts pedal movement.
4) Post-installation checks and function verification
With the vehicle stationary and secured, check that the pedal moves smoothly and returns, that the assembly is securely mounted and that the hydraulic connections are leak-free. Then safely test clutch disengagement and gear shifting. If there is a fluid leak, the pedal sinks or sticks, or the clutch does not disengage fully, do not take the vehicle for a test drive. If the checks are satisfactory, carry out a short test drive in safe conditions, then check the connections for leaks and verify the fluid level again.
5) Common installation errors and how to prevent them
- Confusing similar-looking assemblies: compare the numbers, mounting points and connections before installation.
- Contaminating the hydraulic circuit: work cleanly and cover open lines immediately.
- Damaging connections or retaining clips: do not force them and check that they are fully secured.
- Insufficient bleeding: follow the procedure for the specific vehicle and check clutch operation before driving.
- Installing the assembly under stress: the assembly and lines must be correctly positioned, without deformation or anything restricting pedal movement.
Reasons why the part can become damaged
The following are general causes of wear or damage that may occur with this type of assembly; they do not describe any defects found in the part offered:
- Wear of pins and bushings through repeated use, which can lead to play, noise or irregular operation.
- Aging of the master cylinder seals, which can result in fluid leakage or loss of hydraulic operating efficiency.
- Contamination or incorrect fluid, which can damage the sealing and internal hydraulic components.
- Excessive stress on the mechanism due to a fault in other clutch control components or forceful pedal operation.
- Incorrect installation and mechanical damage, especially deformed mounts, damaged connections or improperly routed hoses.