Description
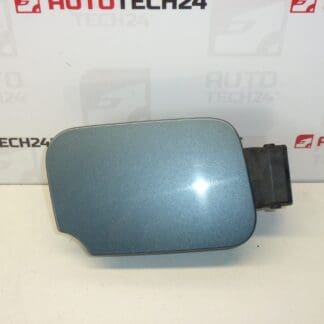
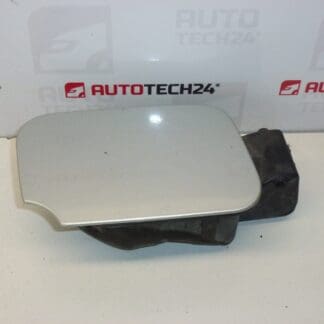
Fuel filler neck lid including housing for Peugeot 407
Color KNN – Alcyon Blue paint
We have various colors
Product Overview
Replacement fuel filler neck lid (fuel filler flap) supplied complete with its housing for Peugeot 407. This part restores the exterior finish and the sealing/latching function of the fuel filler area. Supplied in colour code KNN (Alcyon Blue) — other colours available on request. Designed for fitment where the original exterior lid or its housing is damaged, corroded or no longer latches securely.
Key Benefits
- Complete assembly: lid plus housing for straightforward replacement.
- OEM-compatible fit to maintain correct alignment and sealing against water ingress.
- Colour-matched option (KNN Alcyon Blue) to reduce the need for repainting; other colours available.
- Ideal for professional garages and DIY mechanics performing body or filler-area repairs.
Technical Information
- Manufacturer: Stellantis (Peugeot/Citroën)
- Model: Peugeot 407
- Product Codes: 1517A7, 151877, KNND
- Additional Numbers: Colour Code KNN (Alcyon Blue)
Compatibility
Mainly intended for Peugeot 407 models. Check exterior colour code when ordering to ensure the best visual match. This assembly is suitable for vehicles that use the listed product codes.
Replacement Procedure (Overview)
The following outlines a typical replacement sequence. Procedures can vary by body style and production year—follow the vehicle manufacturer’s repair instructions where available.
- Open the filler lid and remove any trim or inner liners that block access to the hinge and fixing points.
- Unscrew or unclip the hinge fixings and detach any tether or locking mechanism if present.
- Remove the old housing and clean the mounting area, checking for corrosion or damage to surrounding panels.
- Fit the new housing and lid assembly, ensuring correct alignment of the hinge and latch. Tighten fasteners to the specified torque.
- Reinstall trim and test the latch operation and sealing by closing the lid and checking for free movement and secure catch.
Recommendations For Installation
- Perform installation in a dry, well-lit area and keep fasteners and clips organised during removal.
- Inspect securing points and surrounding bodywork for corrosion. Treat or repair any rust before installing the new unit to ensure long-term retention.
- If the assembly contains an electrical release or locking actuator, disconnect the vehicle battery before working and follow safe handling procedures.
- After installation, verify proper alignment and that the lid closes flush with the body to avoid aerodynamic noise or water ingress.
Why This Part Most Commonly Fails
- Impact Damage: Parking knocks or minor collisions often deform or crack the lid or hinge.
- Mechanical Wear: Hinges, clips and latch mechanisms wear out over time and can break or stop holding.
- Corrosion: Moisture and road salt may corrode the housing or mounting points, compromising fitment.
- Paint Damage: Chipped or scratched finish around the filler lid leads owners to replace the entire assembly for a visual repair.
Notes
This listing refers to the part numbers given above. Colour-matched options reduce the need for repainting, though minor adjustments may still be required for a perfect factory match. Suitable for professional fitters and competent DIYers familiar with bodywork and trim removal.