Description
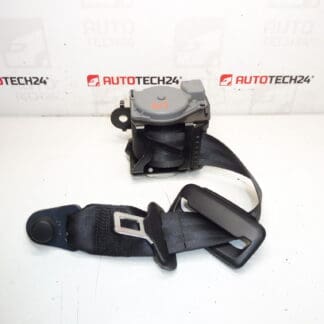
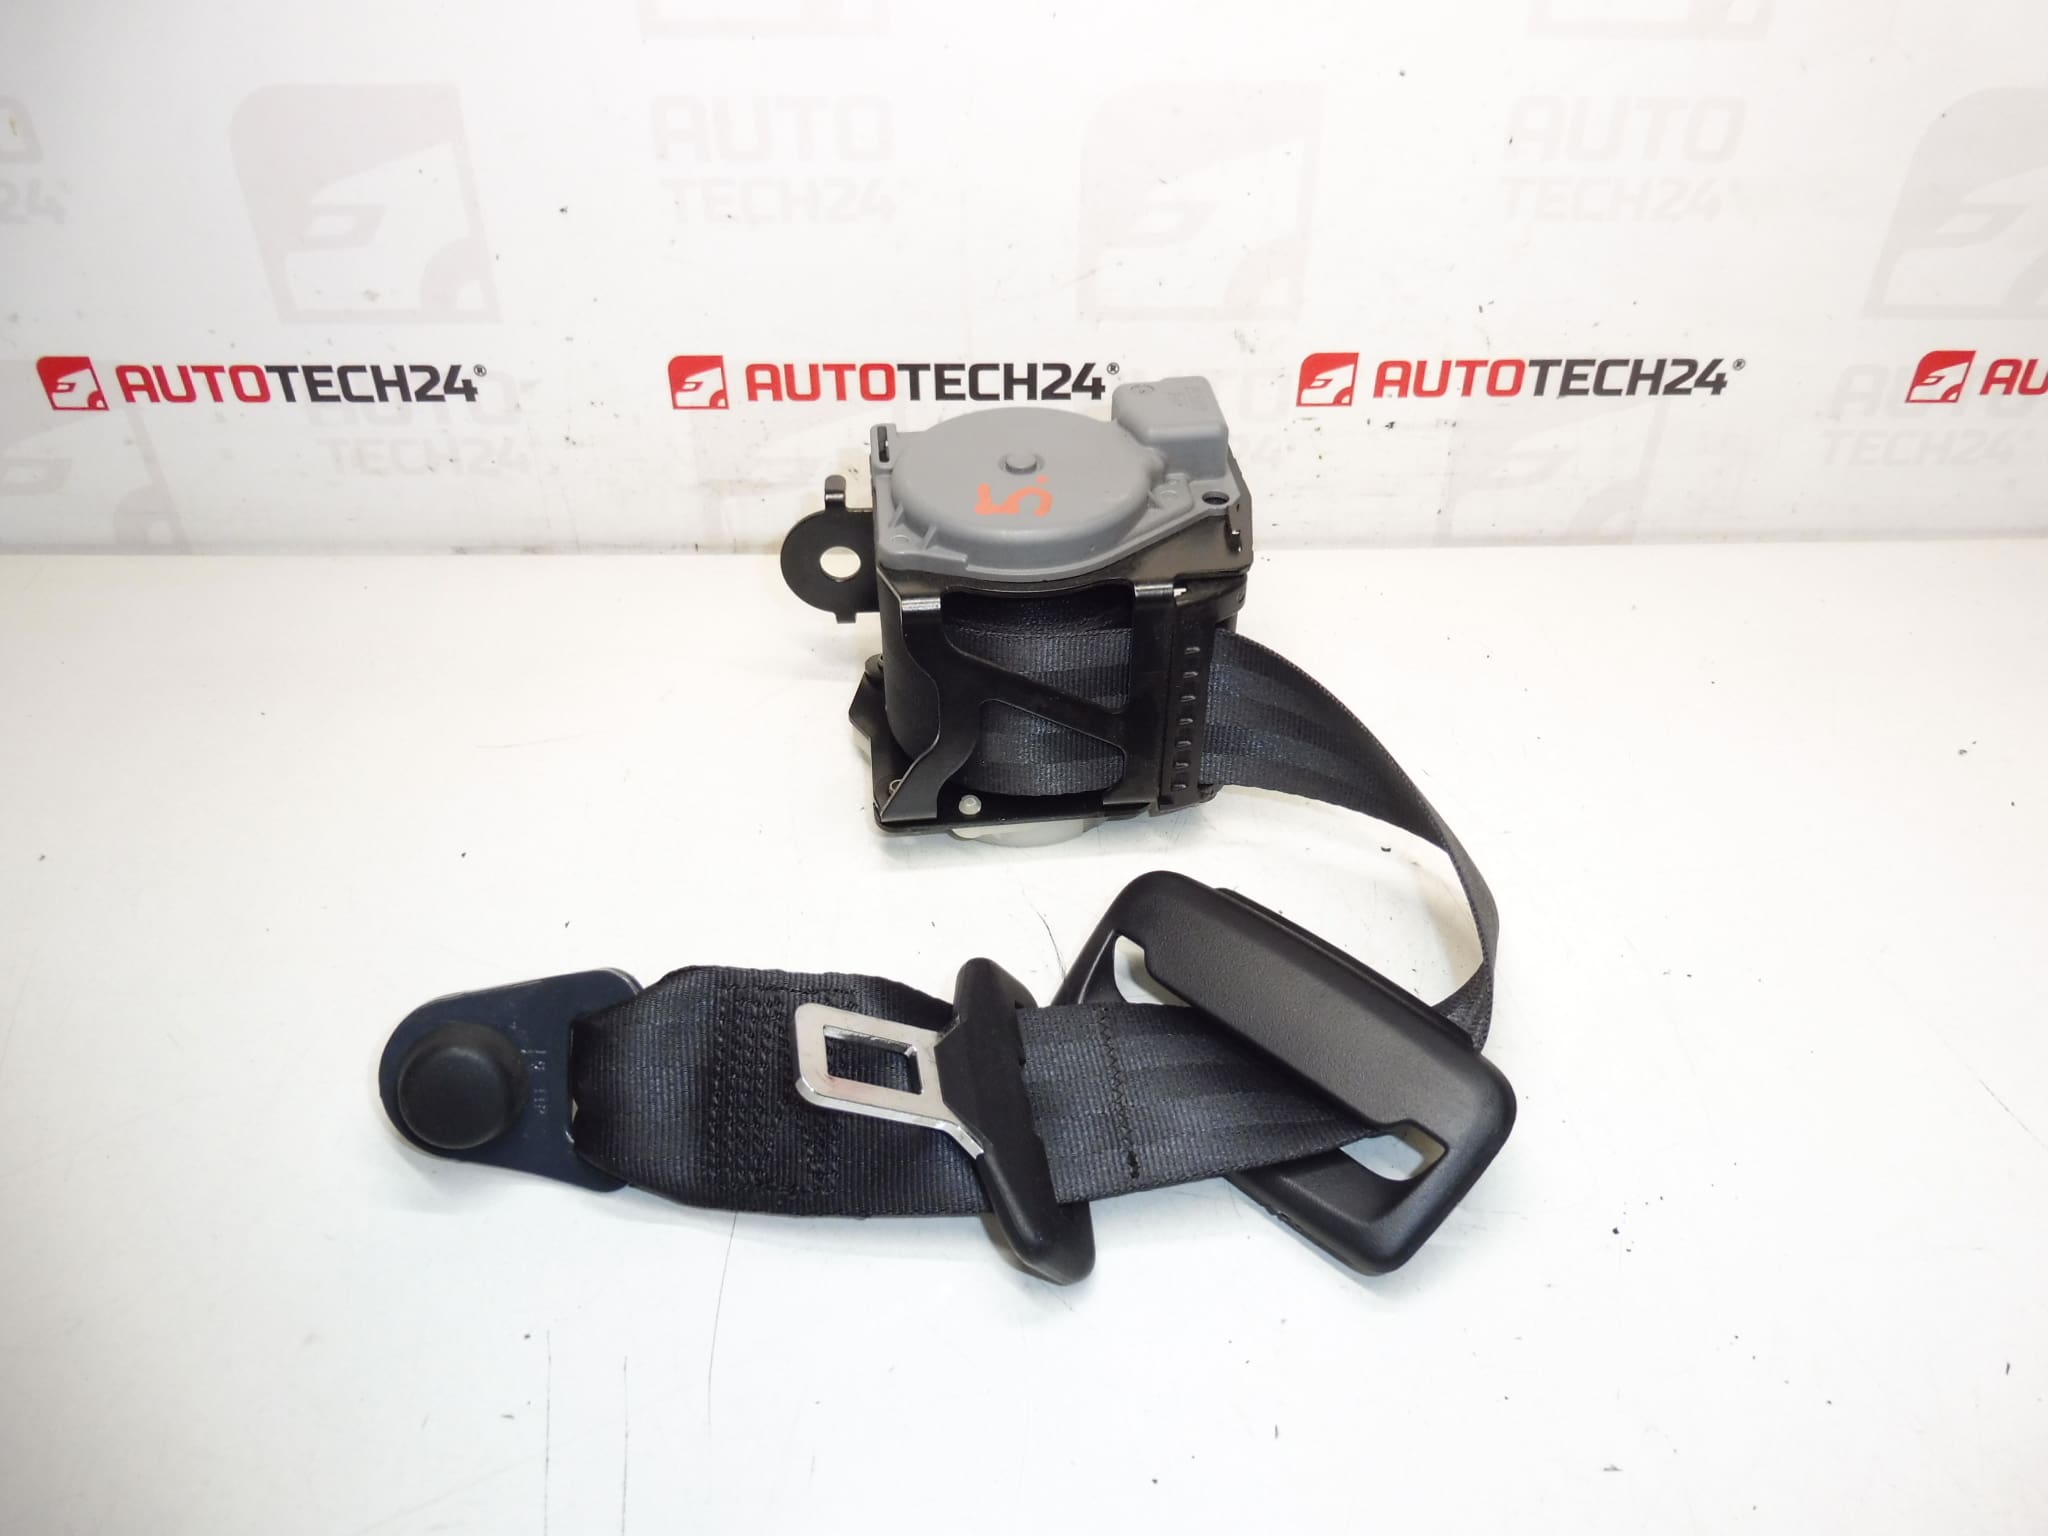
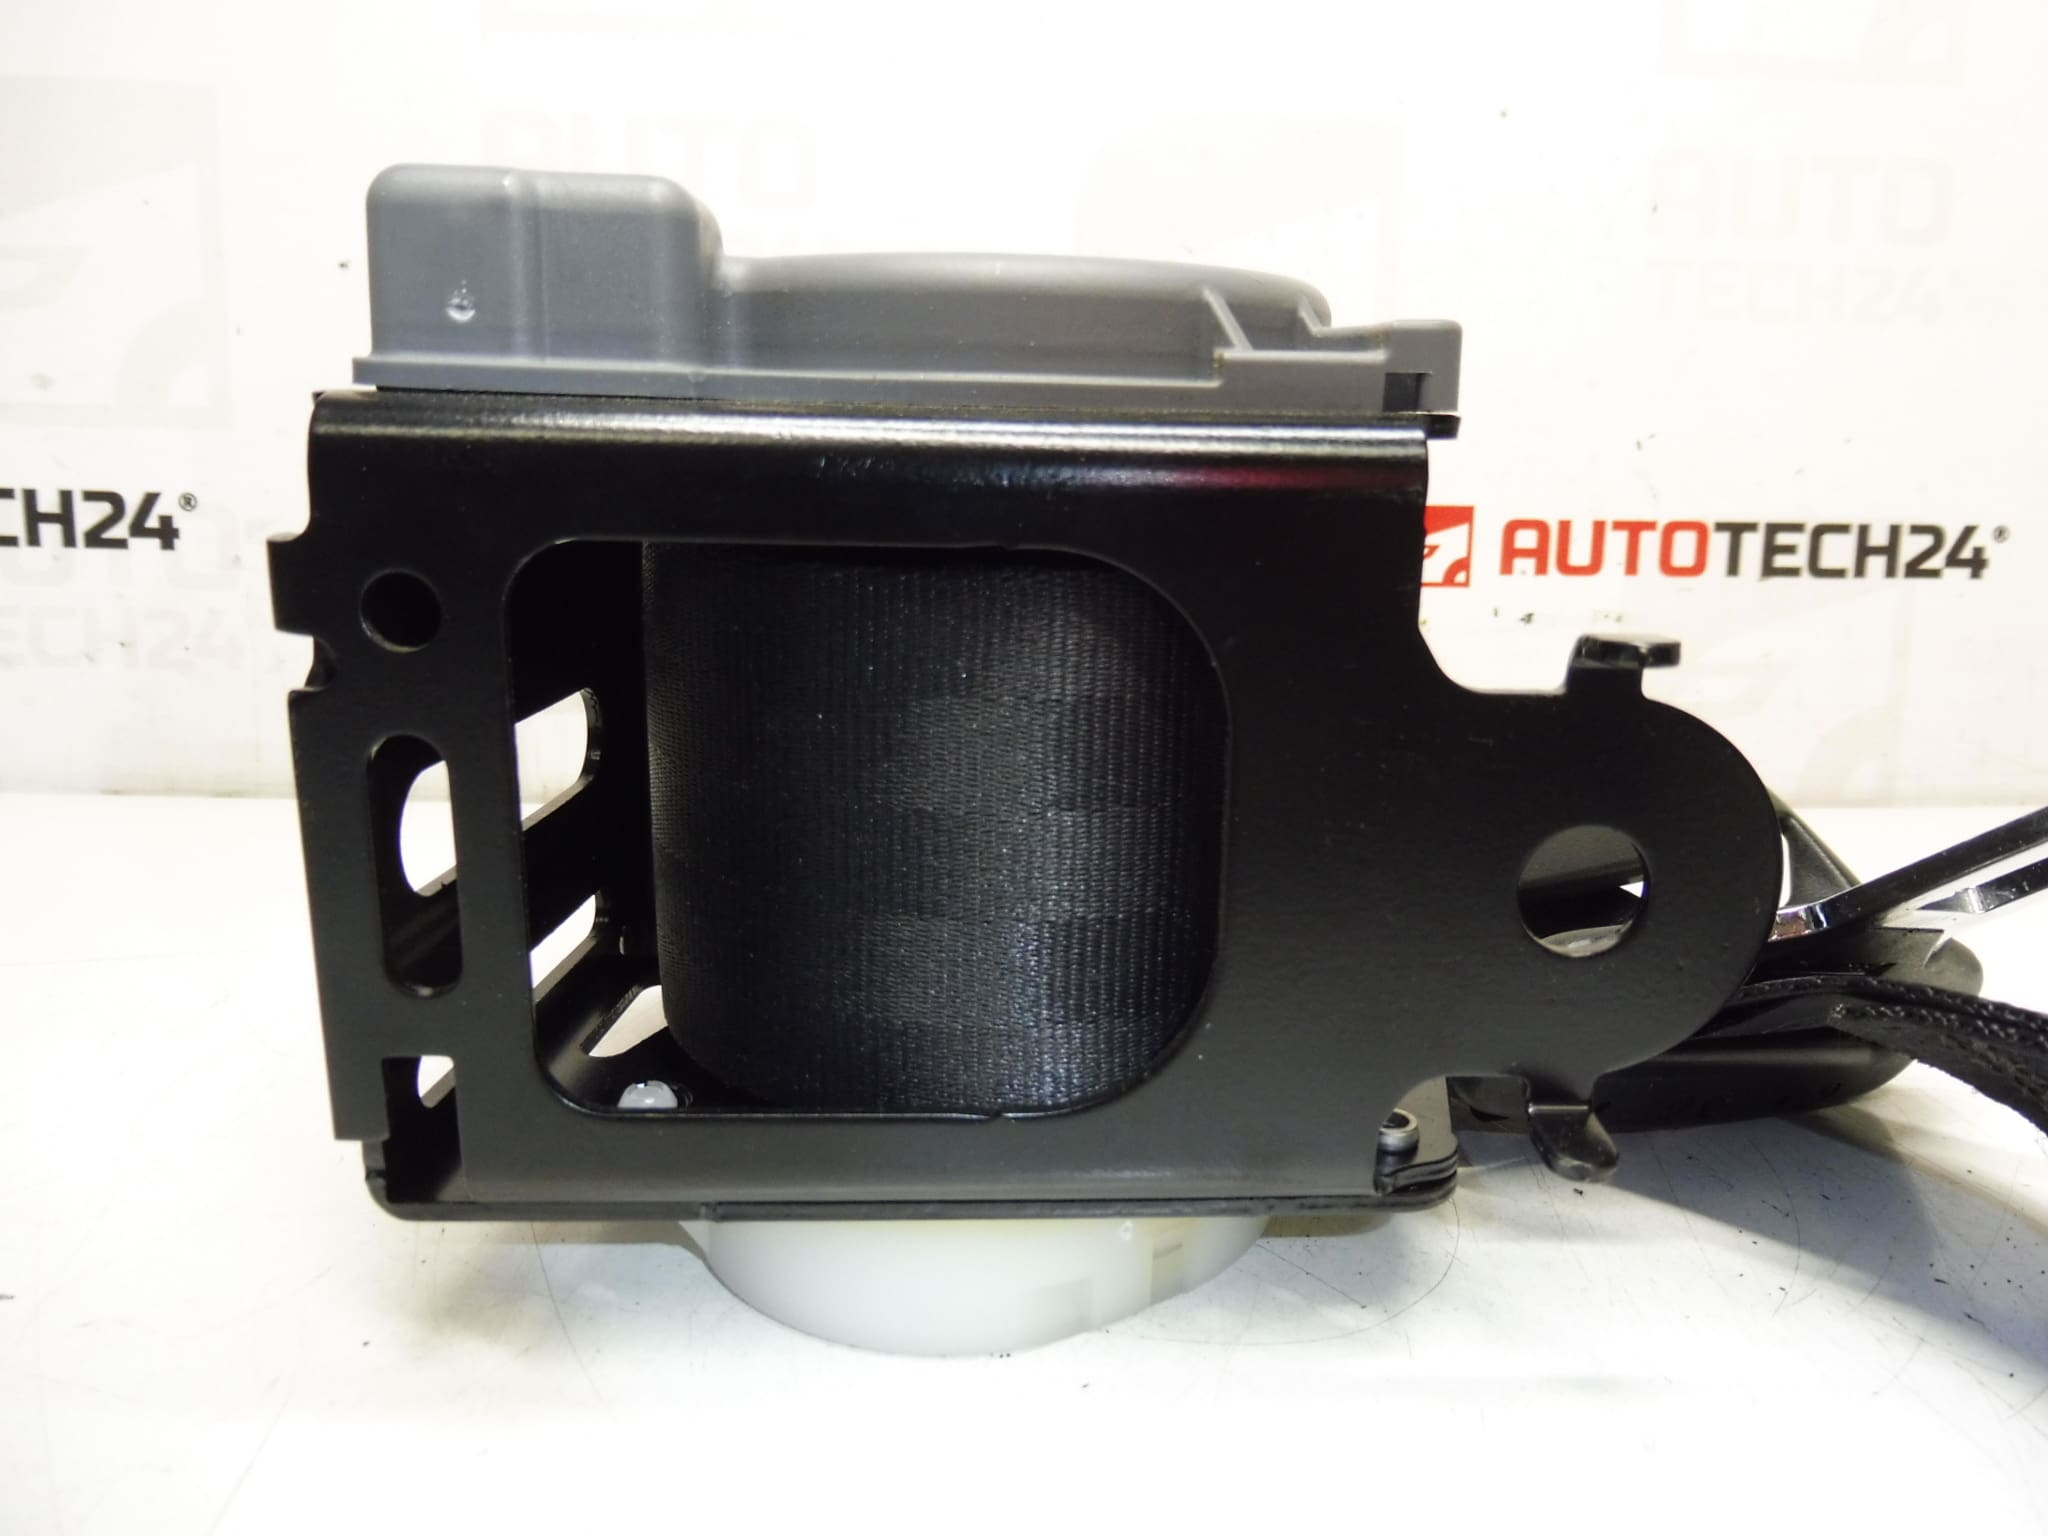
Left and right rear seat belt for Citroen C4 II and DS4 cars
Version FXX – BLACK WITH ALARM
Part description
The used rear seat belt is designed for Citroen C4 II and DS4 cars. This is the FXX – black with alarm version, which is suitable as a spare part if the original belt is damaged, blocked or not working.
The part is suitable for the left and right rear side according to the specific design in the car. For safety features, it is important to pay attention not only to code matching, but also to overall visual design, connector type, and mechanical condition.
Technical information
- Manufacturer: Stellantis Citroën Peugeot
- Model: Citroen C4 II, DS4
- Other numbers: 8975ZR, 8976C2
Product codes
Product codes: 96871541XX, 8975ZR, 8976C2
Models from labels/backgrounds: Citroen C4 II, DS4
Installation recommendations
Generally/typically for this type of part, the exact replacement procedure may vary depending on the specific design of the interior and equipment of the car. Care must be taken with the seat belt, as it is an important safety element.
1) Before assembly
- Check that the part codes and design FXX – black with alarm match.
- Compare the used part with the old part: the shape of the winder, the attachment, the belt guide, the connector and the length of the wiring.
- Check the mechanical condition of the belt – it must not be frayed, cut, broken or heavily soiled.
- Test the winding and blocking function of the mechanism in the normal working position.
- Before working, it is advisable to disconnect the battery, especially if the part contains an electrical signal connection.
2) Necessary tools and materials
- A common set of hand tools
- Tools for gentle removal of interior plastics
- Suitable heads and ratchet
- Cleaning agent for contact surfaces
- Work gloves and sufficient lighting
3) Step-by-step assembly procedure
- Secure the vehicle against movement and prepare a working space in the rear of the interior.
- Disconnect the battery if the belt includes an electrical signaling or alarm connector.
- Remove the necessary parts of the interior trim to gain access to the belt anchor and retractor.
- Carefully disconnect the electrical connector if present.
- Release the attachment points of the old belt and remove the entire mechanism without damaging the surrounding plastics and upholstery.
- Compare the old and new part side by side, especially the orientation of the winder, the grips and the belt guide.
- Place the used belt in the correct position so that it is not twisted and the retractor is in the same orientation as the original part.
- Attach all mounting points and make sure the mounting is properly seated.
- Connect the signaling electrical connector if it is part of the part.
- Before reinstalling the trim, pull out and let the belt slide in a few times to check for smooth operation.
- Check the locking function by jerking the belt violently.
- Reassemble all the removed interior parts.
-
4) Post-assembly checks and test drive/function verification
- Verify that the belt extends smoothly and retracts properly.
- Check that the belt is not twisted anywhere or rubbed against plastic parts.
- Try snapping into the lock and then releasing.
- If an alarm or signaling is included, verify proper system response.
- During the test drive, listen for squeals or knocks coming from the mounting area.
5) The most common assembly mistakes + how to avoid them
- Twisted belt – always check the entire belt guide before final tightening.
- Wrong winder position – the winder mechanism must be fitted in the appropriate working position.
- Damage to plastic panels – use a suitable pry bar for interior parts.
- Insufficient connector comparison – check electrical connection and mechanical mounts match before assembly.
- blocking of the mechanism after impact or sudden overload
- wear of the winding mechanism during long-term use
- damage to the webbing by rubbing, pinching or careless handling
- contamination of the mechanism with dust and dirt from the interior
- malfunction of the electrical signaling or the connector in the version with an alarm