Description
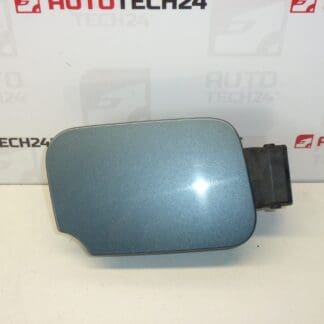
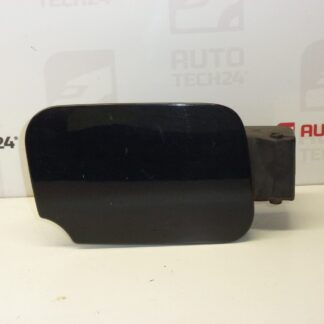
Fuel filler flap including housing for PEUGEOT 407 vehicles. Color EYPC – Paint Gray Fulminator / Oruro. We have various colors.
This fuel filler flap is a direct-fit replacement designed for Peugeot 407 models. It restores the visual finish and functional protection of the fuel filler area, matching the vehicle’s body color when ordered in the correct paint code. Ideal for professional garages and DIY mechanics who need a reliable, body‑color external part to replace a damaged or worn filler flap.
Key Benefits
– Direct fit for easy installation and precise alignment with the existing fuel filler opening.
– Supplied with the housing to ensure correct mounting and sealing.
– Available in multiple colors; specify color code to ensure paint match (EYPC for Gray Fulminator / Oruro).
– Useful spare for repair shops handling collision, corrosion or vandalism repairs.
Technical Information
- Manufacturer: Stellantis (Citroën / Peugeot)
- Model: Peugeot 407 (Saloon / SW / Coupe)
- Product Codes: 1517A7, 151877, EYPC
- Other Numbers: Not Available
Function And Common Faults
The fuel filler flap protects the fuel filler neck from dirt, moisture and unauthorized access while preserving the vehicle appearance. Common failures include broken hinges or mounting tabs, damaged locking actuators (if fitted), paint damage from impacts or corrosion around the aperture. Visible damage or a flap that does not close flush can allow dirt and water ingress and should be repaired promptly.
How To Replace
Replacement is straightforward for experienced technicians and competent DIYers. Typical steps:
- Open the filler flap and inspect for visible fasteners or clips.
- Access the rear of the filler housing via the boot/trunk or wheel-arch liner by removing the appropriate trim pieces to reach the retaining screws or bolts.
- Disconnect any electrical connector if the flap includes a locking actuator or illumination—label connectors to ensure correct reconnection.
- Remove the retaining screws/clips and extract the old flap and housing assembly.
- Fit the new unit, secure fasteners, reconnect electrical connectors and check operation and flush alignment with the bodywork.
- Check the seal around the filler neck and ensure the flap closes and locks smoothly.
Installation Recommendations
- Always protect surrounding paint with masking tape or soft covers during removal and installation to prevent scratches.
- If the part includes an electric locking actuator, disconnect the battery before working on electrical connectors to avoid short circuits and follow vehicle manufacturer safety procedures.
- Use threadlocker on steel fasteners if corrosion is present, and replace any damaged clips or screws for secure mounting.
- Verify paint match using the vehicle color code (EYPC for Gray Fulminator / Oruro) and consider professional respray if precise color matching is required.
- After installation, cycle the flap several times and inspect the seal for correct seating and leaks.
Why This Part Most Often Fails
Typical causes of failure are impact damage from minor collisions or parking incidents, corrosion at the mounting points, plastic hinge fatigue from repeated use, vandalism, and failing locking actuators. Environmental exposure (UV, road salt) accelerates wear and can cause paint degradation and corrosion around the filler aperture.
Maintenance Tips
Keep the filler area clean and free of debris, lubricate moving hinge points with a suitable grease, and inspect periodically for signs of corrosion or looseness. Prompt replacement of a damaged flap prevents further bodywork deterioration and potential contamination of the fuel filler area.