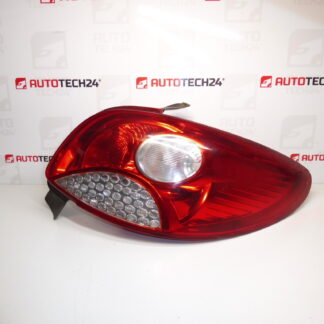
Description
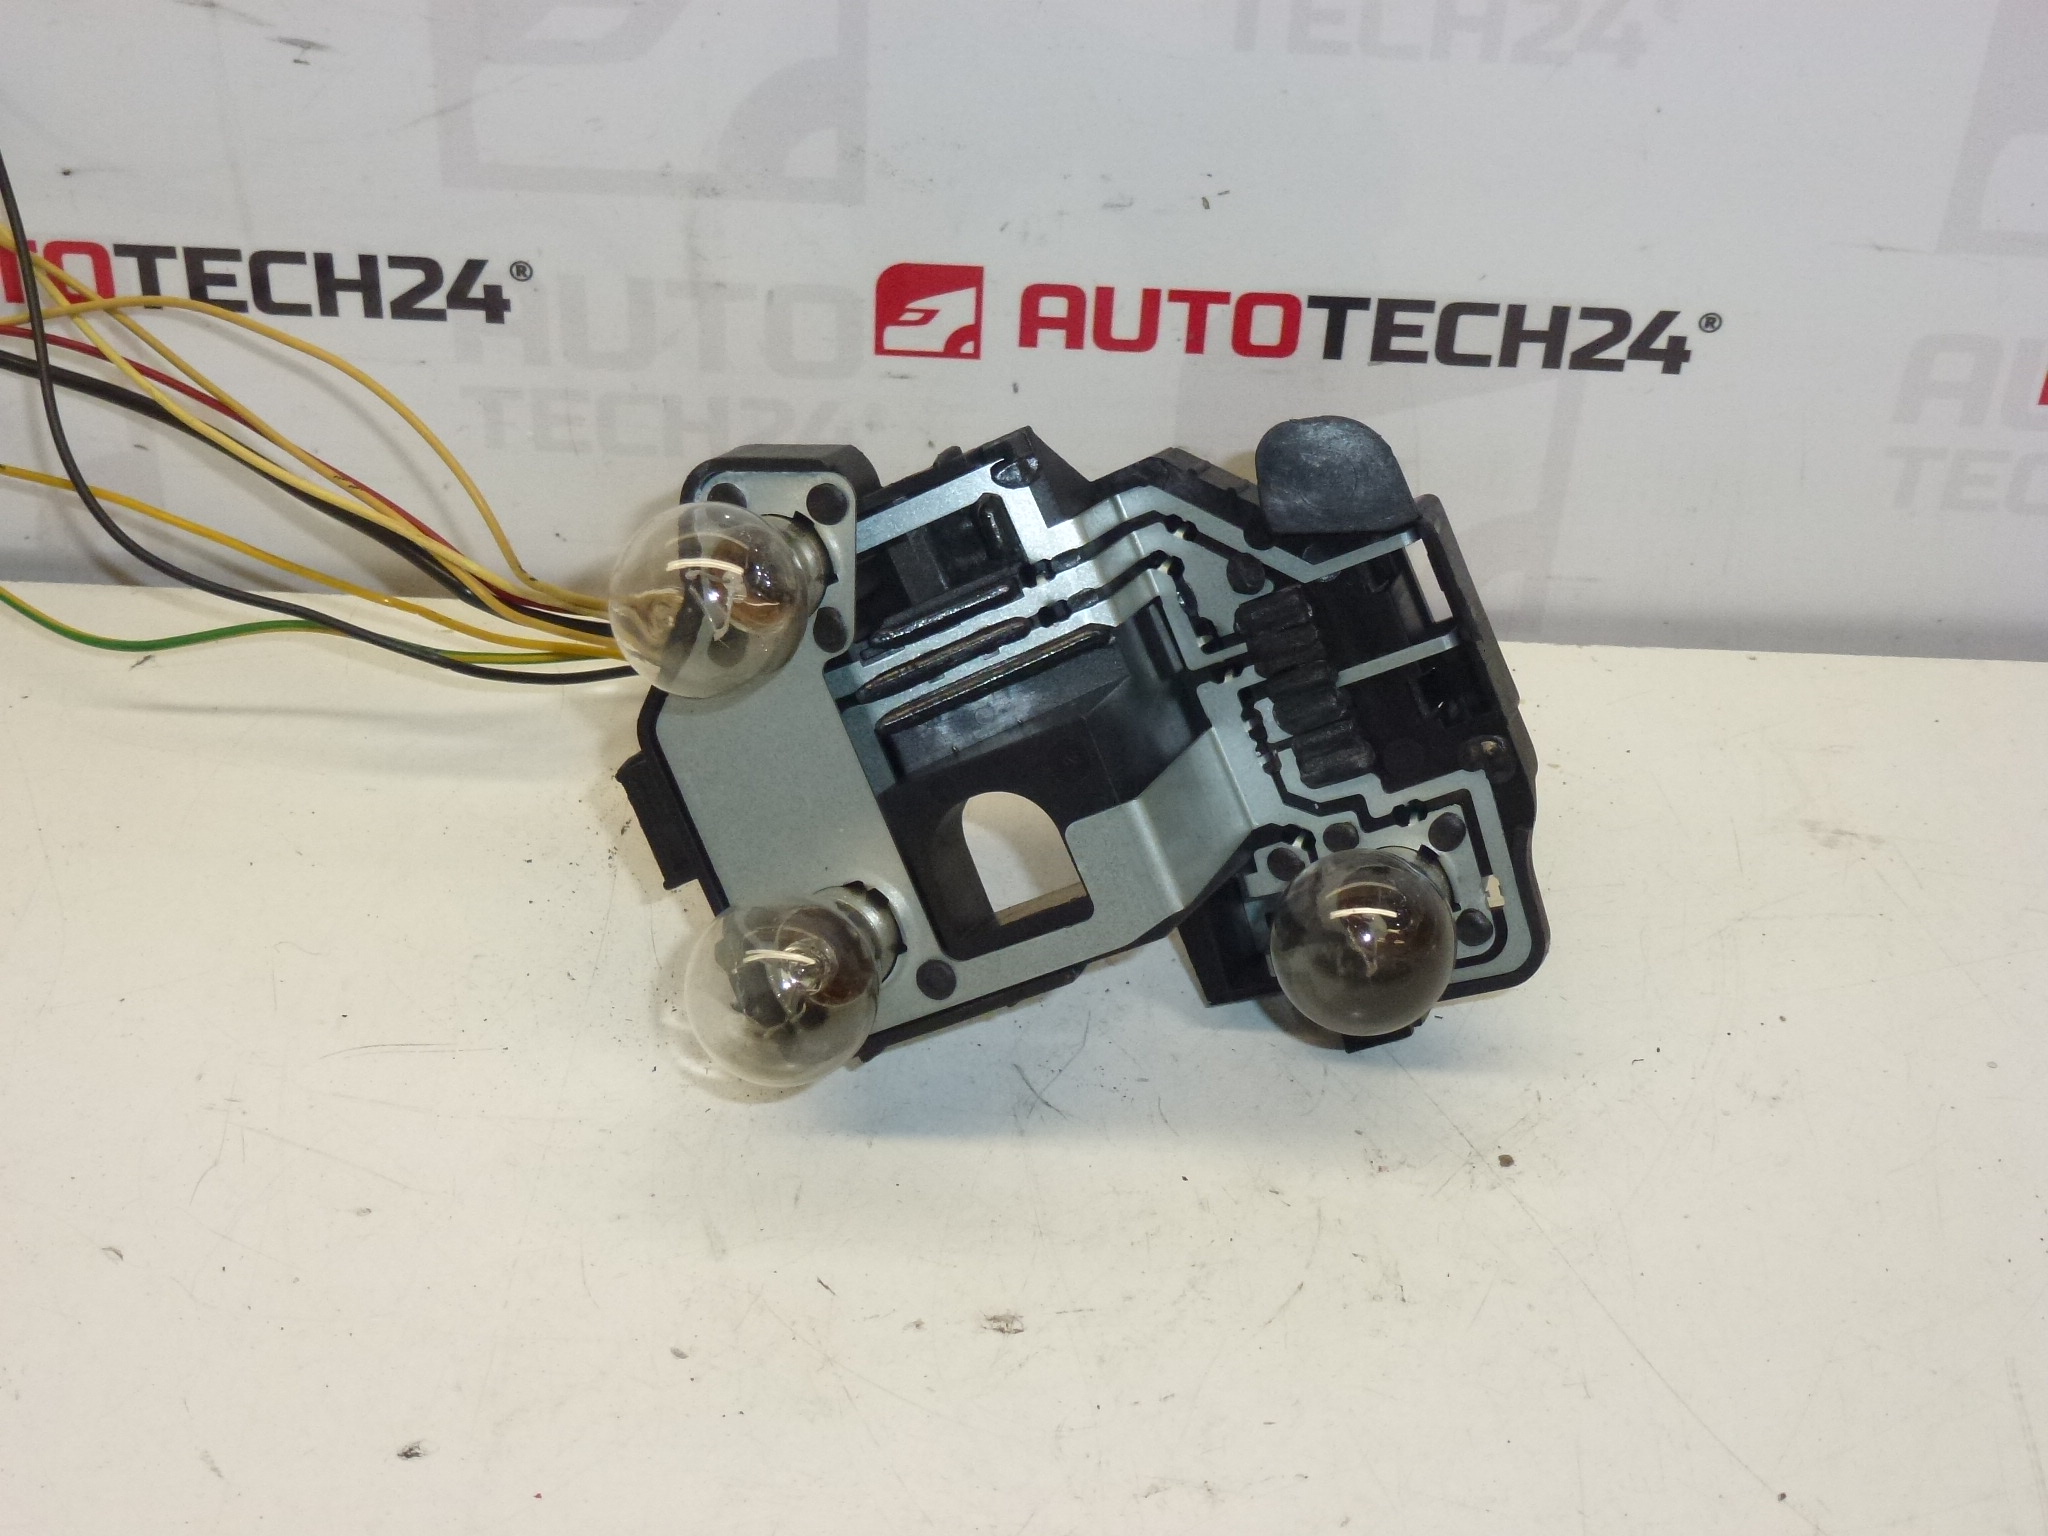
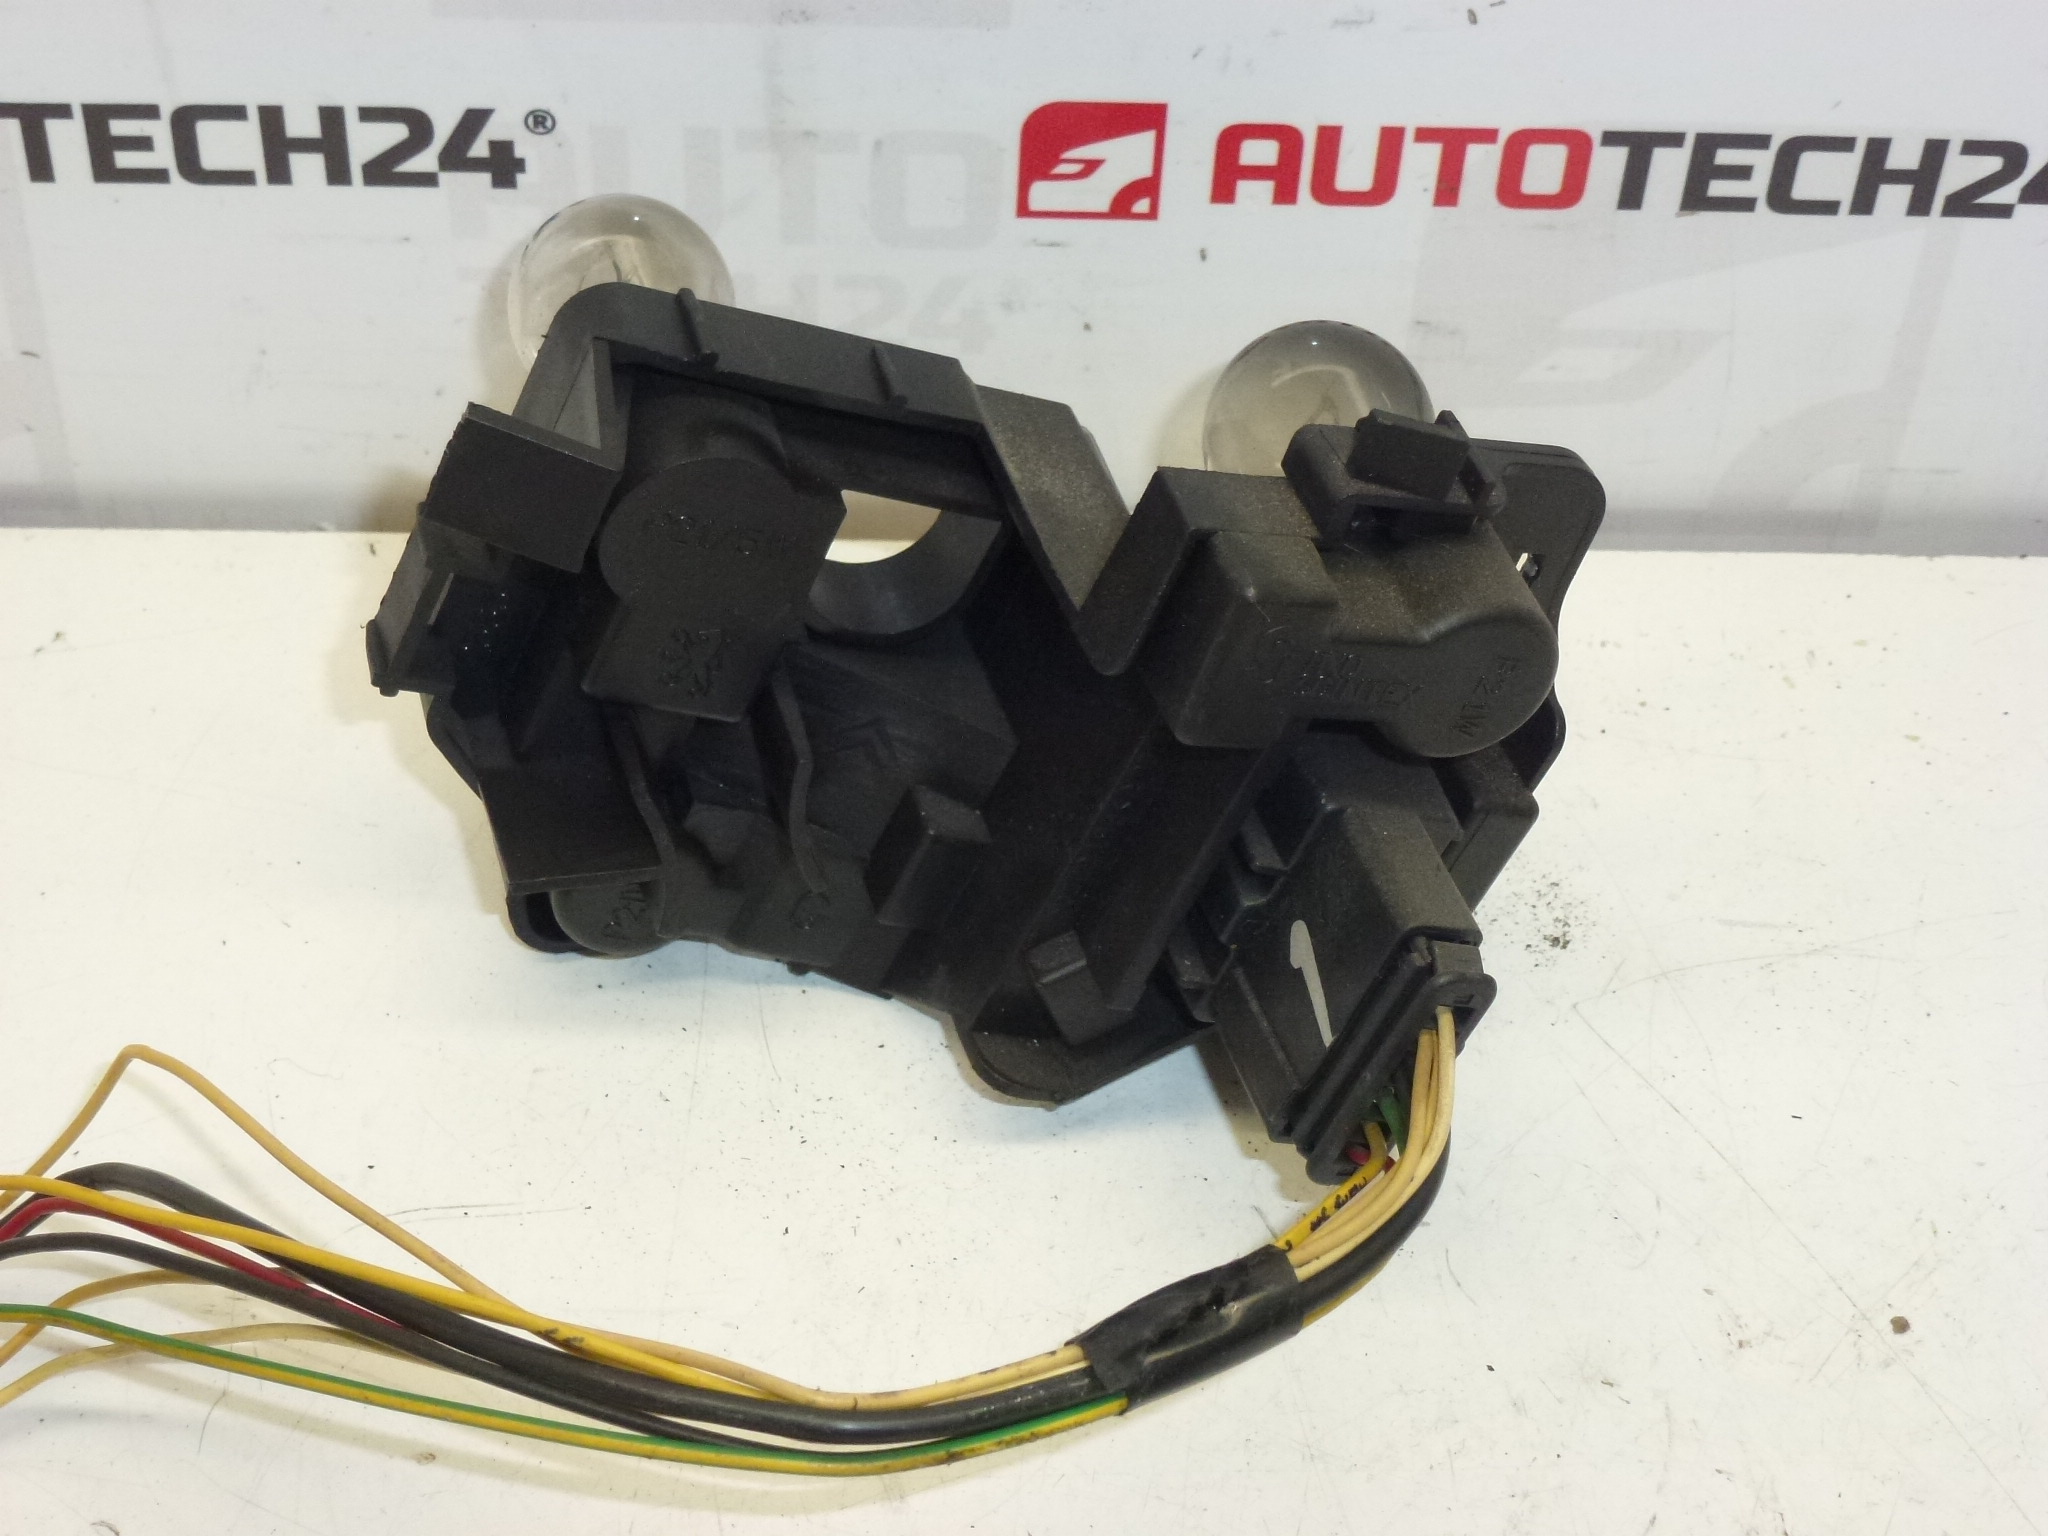
Left rear lamp socket with wiring harness for Peugeot 206 3/5 Door from production date 07/2003. Not rusted, fully functional. Functionality Of The Bulbs Is Not Guaranteed. Driver’s Side.
This genuine used left rear lamp bulb holder with wiring harness is a direct fit replacement for Peugeot 206 (3-door and 5-door) models from July 2003 onwards. Supplied under code 6350S0, the part restores secure electrical contact and mechanical retention for the rear lamp cluster, helping to eliminate intermittent lighting faults, poor earth connections, or loose bulbs. Ideal for professional garages and DIY mechanics seeking a straightforward, cost-effective repair. Keywords: Peugeot 206 tail light socket, 6350S0, rear lamp bulb holder, left rear wiring harness.
Technical Information
- Manufacturer: Stellantis / Peugeot
- Model: Peugeot 206 (3-door and 5-door) From July 2003 Onwards
- Product Codes: 6350S0
- Other Numbers: Not Available
Fitment And Function
The part is fitted to the left rear lamp cluster (driver’s side) and provides the electrical connection and mechanical mount for the rear bulbs. It routes power and earth to the brake, tail, and indicator bulbs (depending on the cluster configuration) and secures the bulbs in the lamp housing.
How To Replace
- Disconnect The Battery Before Starting Work.
- Access The Rear Lamp From Inside The Tailgate Or Boot: Remove Interior Trim Panels To Reach The Lamp Cluster.
- Remove The Lamp Unit Mounting Screws And Pull The Cluster Out Slightly To Expose The Bulb Holder.
- Unplug The Wiring Connector From The Socket And Remove The Bulbs From The Holder.
- Release Any Clips Holding The Socket/Wiring Harness And Remove The Old Part.
- Install The Replacement Socket And Harness, Refit Bulbs, Reconnect The Connector And Secure All Clips.
- Test All Light Functions (Tail, Brake, Indicator, Reverse If Applicable) Before Reassembling Trim.
Installation Recommendations
- Always Disconnect The Battery Prior To Removal To Avoid Short Circuits Or Damage.
- Inspect Connector Pins For Corrosion Or Burning; Clean Contacts With Contact Cleaner And Apply Dielectric Grease To Improve Long-Term Reliability.
- Ensure Wiring Harness Is Routed Securely And Protected From Chafing; Replace Any Damaged Clips.
- Test Functionality After Installation And Verify Proper Grounding To Avoid Flickering Or Intermittent Faults.
Why These Parts Fail
Common failure modes include plastic embrittlement and cracking due to age and heat cycles, corrosion of connector pins from moisture ingress, poor contact caused by loose or oxidized connections, and overheating from high-resistance contacts. Physical damage during loading/unloading or impact to the lamp cluster can also break the socket or wiring. On older vehicles, insulation degradation and connector fatigue are frequent causes of intermittent or non-functioning lamps.